Gold-Striped Herringbone Crab Knit Free Pattern
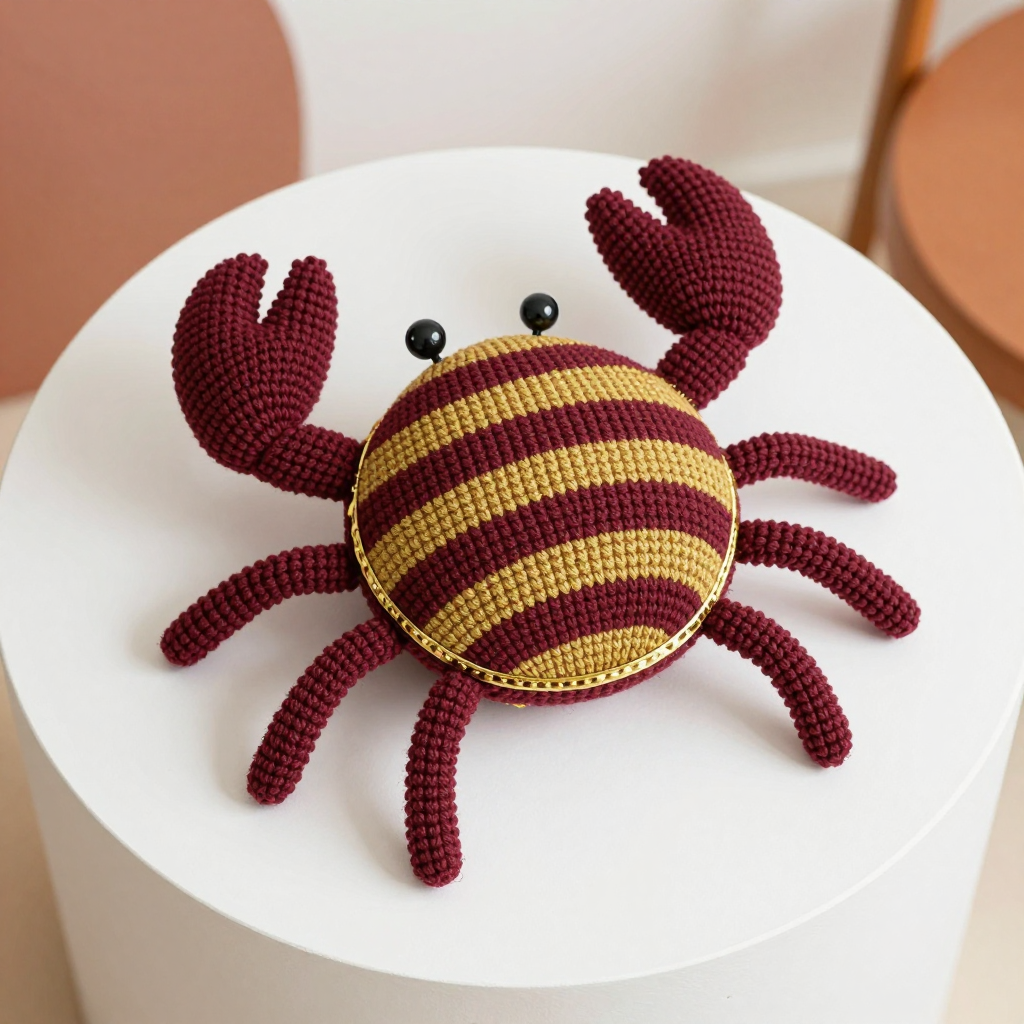
Gold-Striped Herringbone Crab Knit Free Pattern
Introduction
This little boho beach crab is a joy to knit and even more fun to squish. It's written for knitters who are comfortable with knit and purl and are ready to try a simple herringbone-style decrease sequence that shapes the whole shell as you go. The egg-shaped body is worked flat in alternating burgundy and gold bands, so the narrow stripes appear automatically as you change colors, and the flat bottom gets a neat gold edging. Two small stuffed claws and six straight legs finish the look, giving it that relaxed, handmade seaside charm. It's a quick weekend project that makes a lovely shelf companion or a gift for a beach-loving friend.
Materials Needed
- Yarn: Sport weight cotton (100% cotton, 50g/125yd). Burgundy (A): 70 yd. Gold (B): 50 yd.
- Needles: 3.5 mm (US 4) knitting needles (straight or circular worked flat).
- Notions: Tapestry needle, stitch markers (optional), small amount of polyester fiberfill for stuffing, scissors.
- Finished size: Body 4.5 inches wide and 3.5 inches tall; legs 2.5 inches long.
Abbreviations
- CO: cast on
- BO: bind off
- st(s): stitch(es)
- k: knit
- p: purl
- RS: right side (the outside of the work)
- WS: wrong side (the inside of the work)
- sl1: slip one stitch purlwise without knitting it
- psso: pass the slipped stitch over the stitch just knitted
- k2tog: knit two stitches together (one decrease)
- St st: stockinette stitch (knit on RS rows, purl on WS rows)
- rep: repeat
Gauge
24 sts and 32 rows = 4 inches in herringbone stitch. Knit a small swatch in pattern, lay it flat without stretching, and count stitches and rows over 4 inches to check before you begin.
Tips Before You Start
- Count your stitches at the end of every decrease row. The pattern drops quickly, and an accurate count keeps the egg shape even.
- Change colors on the wrong-side purl rows as written; this keeps the color joins tidy and the stripes crisp.
- Stuff lightly and in small pieces. Overstuffing stretches the herringbone texture and makes the seams pull.
- Keep your tension relaxed on the slipped stitches so the herringbone columns stay visible after seaming.
Step-by-Step Instructions
Body (worked flat, starting at the bottom)
With A, CO 48 sts.
R1 (WS): purl (48 sts).
R2 (RS): k1, *sl1, k1, psso, k1; rep from * to last st, k1 (32 sts).
R3: purl (32 sts).
R4: k1, *k2tog, k1; rep from * to last st, k1 (22 sts).
R5: purl (22 sts).
Change to B.
R6: k1, *sl1, k1, psso, k1; rep from * to last st, k1 (15 sts).
R7: purl (15 sts).
Change to A.
R8: k1, *k2tog, k1; rep from * to last st, k1 (10 sts).
R9: purl (10 sts).
Change to B.
R10: k1, *sl1, k1, psso, k1; rep from * to last st, k1 (7 sts).
R11: purl (7 sts).
Change to A.
R12: k1, *k2tog, k1; rep from * to last st, k1 (5 sts).
R13: purl (5 sts).
Change to B.
R14: k1, *sl1, k1, psso, k1; rep from * to last st, k1 (3 sts).
R15: purl (3 sts).
Change to A.
R16: k1, k2tog, k1 (2 sts).
R17: purl (2 sts).
R18: k2tog (1 st). Cut yarn and pull through the last stitch.
Claws (make 2, with A)
CO 8 sts.
Rows 1-6: work in St st (8 sts).
Next row: k2tog across (4 sts). Cut yarn and pull through the remaining stitches.
Legs (make 6, with A)
CO 6 sts.
Rows 1-20: work in St st (6 sts).
Next row: BO all stitches.
Edging (with B)
With B, pick up and knit 1 row evenly around the bottom edge of the body, then BO all stitches.
Assembly and Finishing
Seam the two side edges of the body together to form the egg shape, leaving the bottom open. Stuff the body lightly, then sew the bottom closed. For each claw, seam the sides, stuff lightly, and attach one to the front of the body at each side. For each leg, seam into a tube, stuff lightly, and attach three legs to each side of the body. Weave in all ends, then block gently by misting with water and shaping flat; do not press the herringbone texture.
Pro Tips and Variations
- Swap the gold for a sandy beige or cream for a softer, more natural beach palette.
- Make the claws slightly larger by casting on 10 stitches and working 8 stockinette rows for a chunkier look.
- Add a small hanging loop at the top of the shell so the crab can dangle from a bag or shelf.