Island Tote Panel Bag Free Crochet Pattern
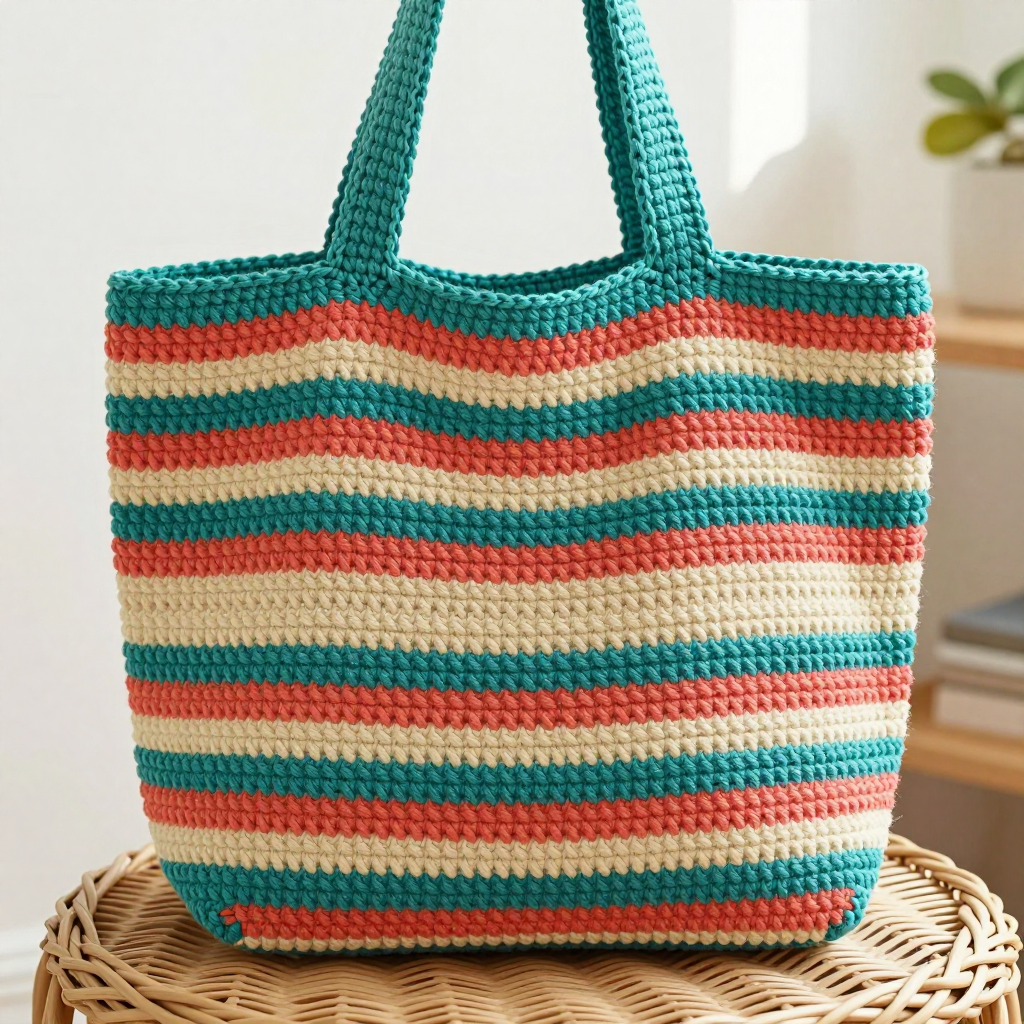
Island Tote Panel Bag Free Crochet Pattern
Introduction
The Island Tote is a cheerful, beginner-friendly crochet bag built from two simple flat rectangles, so there is no shaping, no tricky construction, and no complicated stitchwork to worry about. It is perfect for anyone who has just learned single crochet and wants a real, usable project to show for it. Wide tropical stripes in teal, sand, and coral give it a bright, breezy, beach-vacation feel, while the sturdy single crochet fabric makes it hold its shape nicely. The finished tote is flat and boxy, about 12 inches wide and 14 inches tall, with two small crocheted handles that make it easy to carry your essentials.
Materials Needed
- Yarn: Worsted weight (category 4) acrylic yarn — 150 yards teal (Color A), 100 yards sand (Color B), 50 yards coral (Color C)
- Hook: 4 mm (G-6) crochet hook
- Notions: Tapestry needle, scissors, stitch markers (optional), measuring tape
- Finished size: Approximately 12 inches wide x 14 inches tall (excluding handles), with 6-inch handles
Abbreviations
- ch — chain: make a loop of yarn and pull it through the loop on your hook.
- sc — single crochet: insert hook into stitch, yarn over, pull up a loop, yarn over, pull through both loops.
- st(s) — stitch(es): the loops you work into.
- sl st — slip stitch: insert hook, yarn over, pull through both the stitch and the loop on your hook at once.
- RS — right side: the outside, public face of your work.
- Rnd — round: a row worked in a circle around an opening.
Gauge
16 stitches and 18 rows = 4 inches in single crochet. To check, crochet a small swatch in single crochet and measure a 4-inch section; if you have more stitches than 16, go up a hook size, and if you have fewer, go down.
Tips Before You Start
- Make both panels before you begin joining so the stripes line up neatly when you seam the sides and bottom.
- Keep your turning chains loose but consistent — a tight ch 1 at the start of each row can make the panel edges pull in.
- Count your stitches at the end of every color block; each panel should stay at 48 sc from Row 1 to Row 64.
- Change colors on the last stitch of the previous row so the new color begins cleanly at the edge.
Step-by-Step Instructions
Panel (make 2)
Row 1: With A, ch 49, sc in 2nd ch from hook and each ch across (48 sc).
Rows 2-6: Ch 1, turn, sc in each st across (48 sc). Change to B.
Rows 7-12: Ch 1, turn, sc in each st across (48 sc). Change to C.
Rows 13-16: Ch 1, turn, sc in each st across (48 sc). Change to A.
Rows 17-22: Ch 1, turn, sc in each st across (48 sc). Change to B.
Rows 23-28: Ch 1, turn, sc in each st across (48 sc). Change to C.
Rows 29-32: Ch 1, turn, sc in each st across (48 sc). Change to A.
Rows 33-38: Ch 1, turn, sc in each st across (48 sc). Change to B.
Rows 39-44: Ch 1, turn, sc in each st across (48 sc). Change to C.
Rows 45-48: Ch 1, turn, sc in each st across (48 sc). Change to A.
Rows 49-54: Ch 1, turn, sc in each st across (48 sc). Change to B.
Rows 55-60: Ch 1, turn, sc in each st across (48 sc). Change to C.
Rows 61-64: Ch 1, turn, sc in each st across (48 sc). Fasten off.
Handle (make 2)
Row 1: With A, ch 31, sc in 2nd ch from hook and each ch across (30 sc).
Rows 2-3: Ch 1, turn, sc in each st across (30 sc). Fasten off.
Assembly
Side seams: Place the two panels with RS together. Join A at one side edge and sc evenly along the side edge through both panels (48 sc). Repeat on the other side edge (48 sc).
Bottom seam: Join A at the bottom edge and sc evenly along the bottom edge through both panels (48 sc). Turn the bag RS out.
Attach handles: Position each handle on the top of each panel, 3 inches in from the side edges, with the handle ends overlapping the top edge by 1 inch. Sew securely with A.
Edging
Rnd 1: Join A at the top edge of the bag, sc evenly around the entire top opening, working through both panels at the sides and over the handle ends (approx 100 sc). Join with sl st to first sc. Fasten off.
Assembly and Finishing
Weave in all ends on the wrong side of the bag, working them through several stitches so they stay put. Gently block the finished tote by misting it lightly with water and shaping it flat into its rectangular form; let it dry completely before use. Check that the handle seams are secure by giving each handle a gentle tug, and add a few extra stitches if needed.
Pro Tips and Variations
- Swap the stripe colors for any three shades you love — the simple row counts make it easy to plan your own palette.
- Add a fabric lining for extra structure and to keep small items from slipping through the stitches.
- Make the handles longer for a shoulder bag, or add a button and loop for a simple closure.


