Soft Square Capelet with Ribbed Neck: Free Knit Pattern
Soft Square Capelet with Ribbed Neck: Free Knit Pattern
Introduction
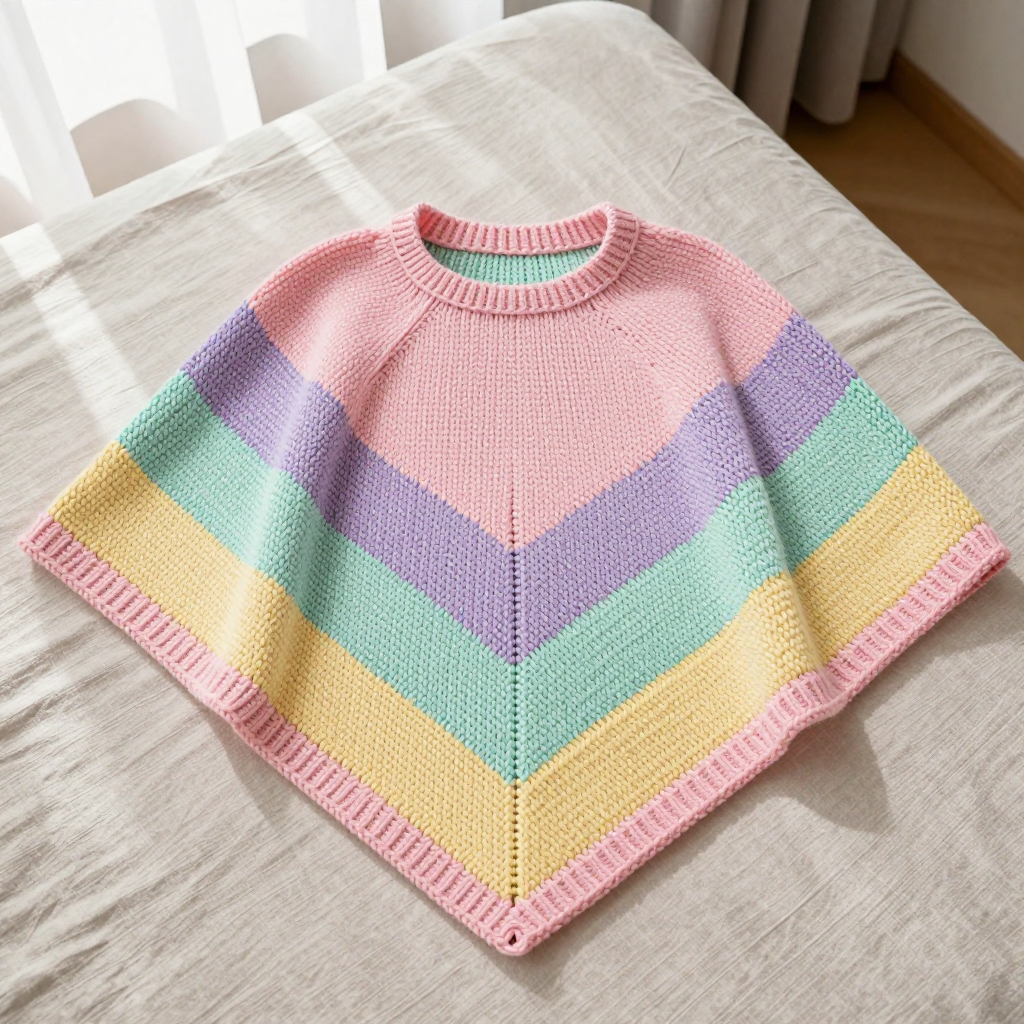
This soft square capelet is the perfect cozy layer for pumpkin season, whether you're sipping cider at the farmers market or curling up with a good book. It's knitted from the center out in a simple moss stitch, so the texture looks intricate but stays wonderfully beginner-friendly. The pastel candy color blocks fade from pale pink through lavender and mint to butter yellow, giving it a dreamy, coastal-grandmother charm. Worked in a fluffy mohair-silk blend held double, it feels light as air yet warm enough to take the chill off a crisp autumn evening.
Materials Needed
- Yarn: Lace weight mohair-silk blend (70% mohair, 30% silk), held double throughout. Color A (pale pink): 200 yd; Color B (soft lavender): 200 yd; Color C (mint green): 200 yd; Color D (butter yellow): 200 yd.
- Needles: 5.0 mm (US 8) circular needle, 24" or longer, for the body; 4.0 mm (US 6) circular needle, 16", for the neckband and hem edging.
- Notions: 8 stitch markers, a tapestry needle, a tape measure, and a spare circular needle or waste yarn for holding stitches if needed.
- Finished size: Neck circumference 20", hem circumference 60", length 18" from neck to hem.
Abbreviations
- CO: Cast on — create the starting stitches.
- K: Knit stitch.
- P: Purl stitch.
- Yo: Yarn over — wrap the yarn around the needle to create a new stitch (this makes the increase).
- Pm: Place marker.
- RS: Right side — the side of the fabric that faces out.
- WS: Wrong side — the inside of the fabric.
- St(s): Stitch(es).
- Rep: Repeat.
- Rnd: Round — one complete circle of knitting in the round.
- BO: Bind off — finish the edge so it doesn't unravel.
- Moss stitch (seed stitch): Alternating knit and purl stitches, offset on each row, to create a bumpy texture.
Gauge
16 stitches and 24 rows = 4" in moss stitch with yarn held double on 5.0 mm needles. To check, knit a 6" x 6" swatch in moss stitch, block it gently, and measure a 4" section in the middle — adjust your needle size if needed to match.
Tips Before You Start
- Hold two strands of the same color together throughout — wind each color into a single cake and pull from both the center and the outside, or wind two separate balls.
- Slip your markers on every row without knitting them, and double-check that you have 8 markers in place before you begin increasing.
- Because the capelet grows quickly, use a circular needle at least 24" long (or switch to a longer cable) so the stitches never feel cramped.
- Keep your yarn overs loose and even — tight yarn overs make the corner increases pucker.
Step-by-Step Instructions
Body (worked flat from center back neck)
With the 5.0 mm needle and Color A, cast on 8 sts. Place markers as follows: 1, pm, 1, pm, 1, pm, 1, pm, 1, pm, 1, pm, 1, pm, 1 (8 sts, 8 markers).
Row 1 (RS): [K1, yo, k1, yo, k1] rep to end, slipping markers (16 sts).
Row 2 (WS): Purl all sts, working each yo as p1 (16 sts).
Row 3 (RS): [K1, yo, k1, yo, k1] rep to end (24 sts).
Row 4 (WS): Purl all sts (24 sts).
Change to moss stitch as follows:
Row 5 (RS): [K1, yo, (k1, p1) to last st before marker, k1, yo, k1] rep to end (32 sts).
Row 6 (WS): [P1, yo, (p1, k1) to last st before marker, p1, yo, p1] rep to end (40 sts).
Continue in moss stitch, increasing 1 st each side of each marker every RS row (8 increases per RS row), until the piece measures 6" from cast-on, ending with a WS row (approx. 200 sts).
Change to Color B. Continue increasing as established for 4".
Change to Color C. Continue increasing as established for 4".
Change to Color D. Continue increasing as established for 4", ending with a WS row (approx. 392 sts).
Bind off: Bind off loosely in pattern.
Assembly of the Body
Fold the square in half diagonally to form a triangular capelet. Sew the side edges from the hem up to 8" from the neck edge, leaving armholes. Weave in ends.
Neckband
With the 4.0 mm needle and Color A, pick up and knit 80 sts evenly around the neck opening. Join to work in the round. Place a marker for the beginning of the round.
Rnd 1: [K2, p2] rep to end (80 sts).
Rnds 2–12: Rep Rnd 1 (80 sts).
Bind off loosely in rib.
Hem Edging
With the 4.0 mm needle and Color A, pick up and knit 1 st in each bound-off stitch around the entire hem. Join to work in the round.
Rnd 1: [K2, p2] rep to end.
Rnds 2–3: Rep Rnd 1.
Bind off loosely in rib.
Assembly and Finishing
Weave in all ends on the wrong side, working them through a few stitches to secure. Block the capelet gently to the finished measurements: neck circumference 20", hem circumference 60", length 18" from neck to hem. Pin it out on a towel or blocking mat, mist lightly with water, and let it dry completely before wearing. Check that the armholes sit comfortably and that the neckband and hem edging lie flat.
Pro Tips and Variations
- Color play: Swap the pastel blocks for tonal shades of one color, or use a single self-striping mohair for a gradient effect.
- Warmer version: Hold the mohair double with a strand of lace-weight merino for extra warmth and a slightly denser fabric.
- Custom fit: Add or remove 4" color sections to change the length, or work the neckband longer for a cozy cowl effect.


