Checkerboard Crochet Bandana Headband Free Pattern
Introduction
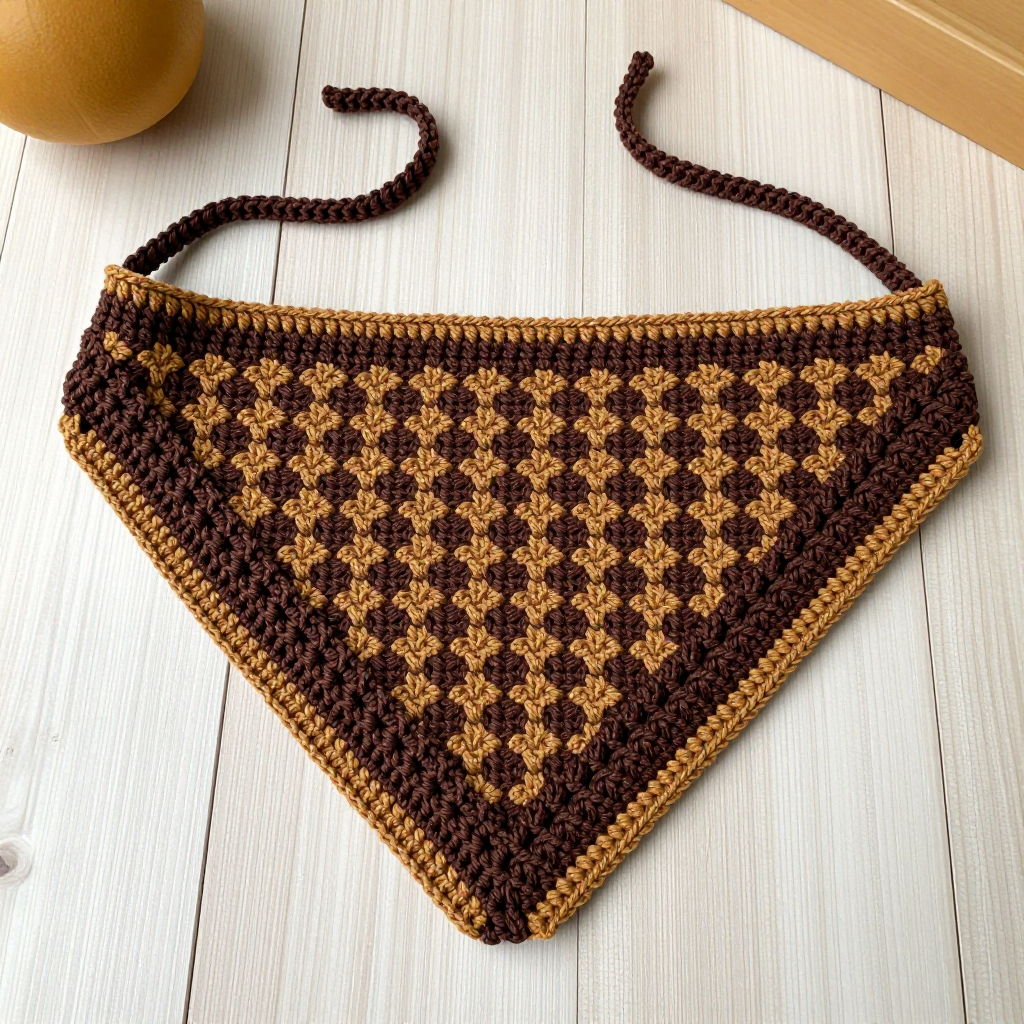
This checkerboard crochet bandana headband is the perfect first project for anyone who has mastered double crochet and wants to try something with a little texture. Worked top-down in alpine stitch, it grows from a tiny 3-stitch point into a wide triangular bandana with a raised, retro checkerboard surface that looks far more complicated than it is. The chocolate brown body with a caramel edging gives it a warm, 90s-inspired feel that suits men and women alike. Soft, squishy super bulky yarn means it works up in an evening or two, and the two ties at the back corners make the fit completely adjustable.
Materials Needed
- Yarn: Super bulky (weight 6) acrylic or wool blend. Chocolate brown (A): approx. 60 yd. Caramel (B): approx. 60 yd.
- Hook: 8 mm (US L-11)
- Notions: Tapestry needle, scissors, stitch markers (optional)
- Finished size: Width at widest (top edge) 20 inches, height 10 inches, ties 12 inches each
Abbreviations
- ch – chain: yarn over and pull through the loop on your hook.
- dc – double crochet: yarn over, insert hook, pull up a loop, yarn over and pull through two loops twice.
- fpdc – front post double crochet: work a double crochet around the post of the stitch below, from front to back, instead of into the top of the stitch.
- sc – single crochet: insert hook, pull up a loop, yarn over and pull through both loops.
- sl st – slip stitch: insert hook, yarn over and pull through both the stitch and the loop on your hook.
- st(s) – stitch(es)
- rep – repeat
Gauge
8 stitches x 6 rows = 4 inches in alpine stitch. Work a small swatch and measure across the middle of it; if you have more stitches than 8 in 4 inches, go up a hook size, and if you have fewer, go down.
Tips Before You Start
- The fpdc is always worked around the post of a stitch from the row below, not into the top of the stitch. Keep those posts loose so the checkerboard texture stays even.
- Both edge increases happen in the very first and very last stitch of every row, which is what creates the triangle. Count your stitches at the end of each row until you trust the rhythm.
- Alpine stitch alternates which stitches get the fpdc from row to row. If your raised blocks look staggered rather than stacked, check that you are working fpdc around the post of a plain dc from the row below.
- The ties are worked in chocolate brown (A) to match the body; the caramel (B) is used only for the edging.
Step-by-Step Instructions
Bandana (A = chocolate, B = caramel)
With A, ch 3.
Row 1: 3 dc in 3rd ch from hook (3 sts).
Row 2: Ch 2, turn, 2 dc in first st, dc in next, 2 dc in last (5 sts).
Row 3: Ch 2, turn, 2 dc in first st, dc in each st across, 2 dc in last (7 sts).
Row 4: Ch 2, turn, 2 dc in first st, [fpdc around next st, dc in next] rep to last st, 2 dc in last (9 sts).
Row 5: Ch 2, turn, 2 dc in first st, [dc in next, fpdc around next] rep to last st, 2 dc in last (11 sts).
Rows 6–40: Continue alternating Rows 4 and 5 (Row 6 follows the Row 4 sequence, Row 7 follows Row 5, and so on), increasing 2 sts per row as set. Each row adds 2 sts, ending with Row 40: Ch 2, turn, 2 dc in first st, [fpdc around next, dc in next] rep to last st, 2 dc in last (81 sts). Fasten off.
Ties (make 2)
With A, ch 31.
Row 1: Sc in 2nd ch from hook and each ch across (30 sts). Fasten off, leaving a long tail for sewing.
Edging
With B, join yarn at top right corner of bandana.
Rnd 1: Sc evenly around entire edge, working 3 sc in each corner. Join with sl st to first sc. Fasten off.
Assembly and Finishing
Sew one tie to each top corner of the bandana using the long tails and a tapestry needle, securing each end with a few extra stitches so it holds up to tying. Weave in all remaining ends on the wrong side. Block lightly by misting with water and pinning the bandana to its finished measurements (20 inches wide, 10 inches tall), then let it dry completely so the alpine stitch texture opens up evenly.
Pro Tips and Variations
- Swap the caramel edging for cream or mustard for a different retro color story, or work the ties in B to match the border.
- For a snugger fit, shorten the ties to 20 chains; for a longer wrap, add 10 chains to each tie.
- Try a self-striping super bulky yarn for the body to get a checkerboard effect without changing colors.