Crochet Chic Neutral Storage Organizer Free Pattern
Crochet Chic Neutral Storage Organizer Free Pattern
Introduction
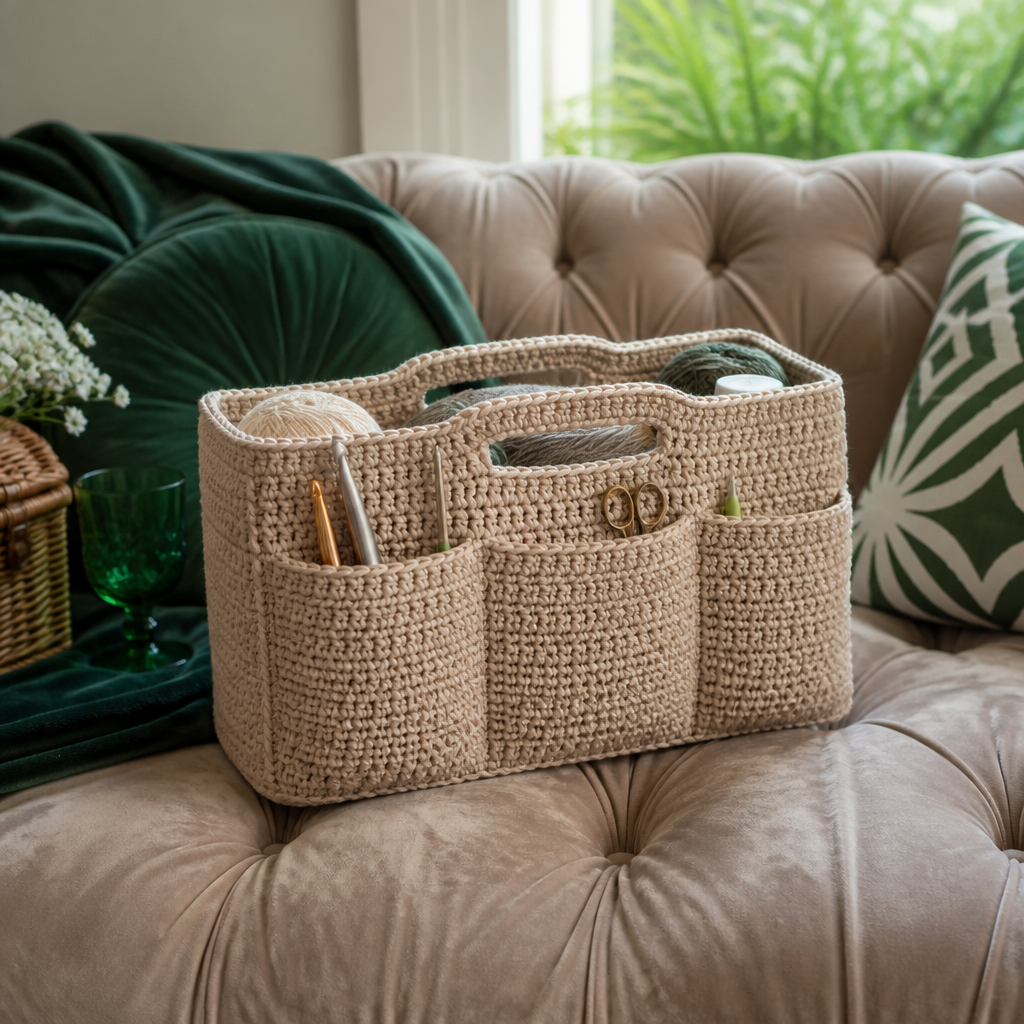
This chic neutral storage organizer is the perfect quick project for beginners who want something useful and modern for their home. Worked in a soft beige bulky yarn with a simple single crochet and waistcoat stitch texture, it has a sturdy, slightly knit-like look that feels dense and durable in the hand. The little basket holds yarn, hooks, tools, or small books, and the three front pockets keep everything tidy and within reach. With its compact size and clean lines, it slips easily onto a shelf, desk, or craft table and adds a calm, neutral touch to any space.
Materials Needed
- Bulky yarn (12 ply), beige, approx. 250–300 yards (230–275 m) total
- Crochet hook 6 mm (US J-10)
- Tapestry needle
- Scissors
- Stitch markers (for handle and pocket placement)
Finished size: Approximately 3.5 inches high x 4.5 inches wide x 2 inches deep (9 cm x 11.5 cm x 5 cm), excluding handles.
Abbreviations
- ch – chain: yarn over and pull through the loop on your hook.
- sc – single crochet: insert hook into stitch, yarn over, pull up a loop, yarn over, pull through both loops.
- sl st – slip stitch: insert hook into stitch, yarn over, pull through both the stitch and the loop on your hook.
- waistcoat st – waistcoat stitch (also called knit stitch): insert hook into the center of the V of the stitch below, yarn over, pull up a loop, yarn over, pull through both loops.
Gauge
14 sts and 16 rows = 4 inches (10 cm) in waistcoat stitch with a 6 mm hook. Check your gauge by working a small swatch and measuring a 4-inch section before you begin, since matching gauge ensures the finished size.
Tips Before You Start
- Keep your tension even and slightly firm so the organizer holds its shape and stands up on its own.
- Use stitch markers to mark the four corner stitches of the base before working in the round; this makes the 3-sc corners easy to find.
- Place stitch markers on each short side to mark handle placement before Round 9 so both handles line up evenly.
- When attaching pockets, sew only through the outer layer so your stitches don't show on the inside of the organizer.
Step-by-Step Instructions
Base and Sides
Ch 16.
Row 1: Sc in second ch from hook and in each ch across (15 sts).
Rows 2–16: Ch 1, turn, sc in each st across (15 sts). Do not fasten off. Base measures approx. 4.5 inches wide x 2 inches deep.
Working in the Round
Rnd 1: Ch 1, sc around the entire rectangle, working 3 sc into each corner. (15 sts on each long side + 15 sts on each short side + 3 sts in each of 4 corners = 66 sts total). Join with sl st to first sc.
Rnd 2: Ch 1, sc in each st around, working 3 sc in each corner st (the middle sc of the 3-sc corner group) (66 sts).
Rnds 3–8: Repeat Round 2 (66 sts). After Round 8, piece measures approx. 3.5 inches high. Do not fasten off.
Top Handle Opening
Rnd 9: Ch 1, sc in each st around until you reach the first handle position. The handles are centered on each short side. On each short side (15 sts), work: sc in first 3 sts, ch 10, skip 9 sts, sc in last 3 sts. Continue sc around the rest of the round, working the same handle opening on the opposite short side. Join with sl st to first sc (66 sts, including 10-ch loops).
Rnd 10: Ch 1, sc in each st around, and work 10 sc into each ch-10 loop. Join with sl st to first sc (66 sts).
Finishing Rounds
Rnd 11: Ch 1, sc in each st around. Join with sl st to first sc (66 sts).
Fasten off and weave in ends.
Pockets (Make 3)
Ch 21.
Row 1: Sc in second ch from hook and in each ch across (20 sts).
Rows 2–20: Ch 1, turn, sc in each st across (20 sts). Do not fasten off. Pocket measures approx. 3 inches wide x 2.5 inches high.
Fasten off, leaving a long tail for sewing.
Attaching Pockets
Step 1: With the organizer lying flat, measure and mark the center of one long side. Mark positions for 3 pockets evenly spaced along that side, leaving about 0.5 inch between pockets and 0.5 inch from each side edge.
Step 2: Pin each pocket in place, aligning the bottom of the pocket with Round 2 of the organizer. Using the long tail and tapestry needle, sew each pocket to the organizer along the sides and bottom with a whipstitch, being careful not to sew through to the inside.
Step 3: Weave in all ends.
Assembly and Finishing
Your organizer is worked in one piece, so the only seaming is the three pockets. Sew each pocket along its sides and bottom with a whipstitch, keeping stitches small and even and catching only the outer layer of the organizer. Weave in all remaining ends on the inside of the piece. To finish, lightly mist or steam block the organizer into shape, pressing the base flat and easing the sides upright; let it dry fully before use so it holds its structure.
Pro Tips and Variations
- Work the body in waistcoat stitch for a denser, knit-look fabric that stands up even better.
- Add a contrasting stripe or two near the top edge for a subtle color accent.
- Make a second organizer in a larger size by adding chains to the base in multiples that keep the corners even.