Earthy Envelope Crossbody Bag: Free Crochet Pattern
Introduction
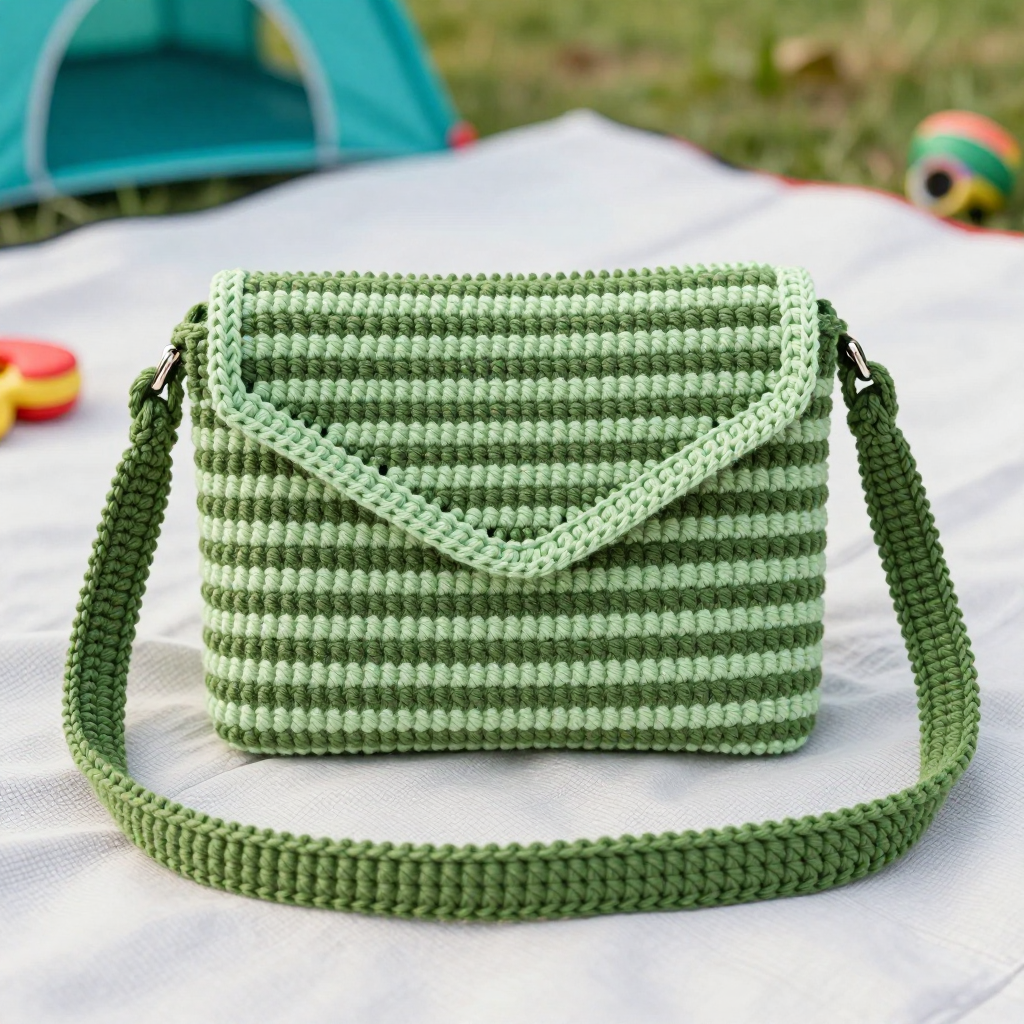
This earthy envelope crossbody bag is the perfect first bag project for anyone who can crochet a rectangle. It's worked flat in half double crochet through the back loop only, which gives the fabric a lovely ridged, woven-looking texture, and the whole bag comes together with just two folds and two short seams. Wide stripes of moss green and lichen keep it calm and minimalist, so it slips easily into a natural, everyday wardrobe. The finished bag is soft but sturdy, holds its envelope shape nicely, and the long strap makes it comfortable to wear hands-free all day.
Materials Needed
- Yarn: T-shirt yarn (approx. 5–7 mm thick), 100% cotton. Color A (moss green): 120 yd. Color B (lichen): 80 yd.
- Hook: 8 mm (US L-11)
- Notions: Tapestry needle, stitch markers, measuring tape, scissors
- Finished size: Bag body 10 inches wide x 12 inches tall (including flap); strap 44 inches long
Abbreviations
- ch – chain: make a loop of yarn and pull it through the loop on your hook.
- hdc – half double crochet: yarn over, insert hook in stitch, pull up a loop, yarn over, pull through all 3 loops.
- blo – back loop only: work into the loop of the stitch that is farthest from you.
- sc – single crochet: insert hook in stitch, pull up a loop, yarn over, pull through both loops.
- st(s) – stitch(es)
- RS – right side: the outward-facing side of your work.
Gauge
10 sts x 8 rows = 4 inches (10 cm) in hdc blo. Work a small swatch in hdc blo and measure the middle of it; if you have more stitches than 10 in 4 inches, go up a hook size, and if you have fewer, go down.
Tips Before You Start
- Because t-shirt yarn is thick and stretchy, keep your tension relaxed and even — tight hdc blo rows make the bag stiff and hard to seam.
- Always work the first hdc of each row into the stitch right next to the turning chain, not into the chain itself, so your stitch count stays at 24.
- Change colors on the last yarn-over of the final stitch of a row so the new stripe starts cleanly at the edge.
- Lay the rectangle flat and check it measures about 10 inches wide before folding; adjust your hook size if it's off.
Step-by-Step Instructions
Bag Body (Color A, then B, then A)
Row 1: With A, ch 26. Hdc in 3rd ch from hook and each ch across (24 hdc).
Rows 2–8: Ch 2, turn, hdc blo in each st across (24 sts).
Change to B.
Rows 9–12: Ch 2, turn, hdc blo in each st across (24 sts).
Change to A.
Rows 13–20: Ch 2, turn, hdc blo in each st across (24 sts).
Change to B.
Rows 21–24: Ch 2, turn, hdc blo in each st across (24 sts).
Change to A.
Rows 25–32: Ch 2, turn, hdc blo in each st across (24 sts). Do not fasten off.
Folding and Side Seams
With RS facing, fold the bottom left and bottom right corners up so they meet at the center of the top edge, forming an envelope shape. Using A and your tapestry needle, whipstitch each side from the bottom corner up to the top corner, leaving the top 4 inches open for the flap. Fasten off.
Strap (Color A)
Row 1: Join A at one top side edge. Ch 1, sc evenly along the side edge (approx. 10 sc).
Row 2: Ch 1, turn, sc in each sc across (10 sts).
Rows 3–88: Repeat Row 2 until the strap measures 44 inches (10 sts). Fasten off.
Attach the free end of the strap to the opposite side edge with A and your tapestry needle.
Edging (Color B)
With RS facing, join B at the top edge of the flap. Ch 1, sc evenly around the entire flap and bag opening. Fasten off.
Assembly and Finishing
Weave in all ends on the wrong side, running each tail through a few stitches before trimming. Smooth the flap into place and gently block the bag by misting it lightly with water and shaping it flat; let it dry fully before wearing so the envelope fold sets. Check that the strap sits evenly on both sides and reinforce the joins with a few extra stitches if needed.
Pro Tips and Variations
- Swap the stripe colors for charcoal and oatmeal, or work the whole bag in one color for a cleaner, more modern look.
- Add a simple button and loop at the flap point to keep the bag closed on the go.
- Make the strap longer or shorter by adding or removing repeats of Row 2 — each repeat adds about half an inch.