Kawaii Tile Ponytail Cuff Free Crochet Pattern
Kawaii Tile Ponytail Cuff Free Crochet Pattern
Introduction
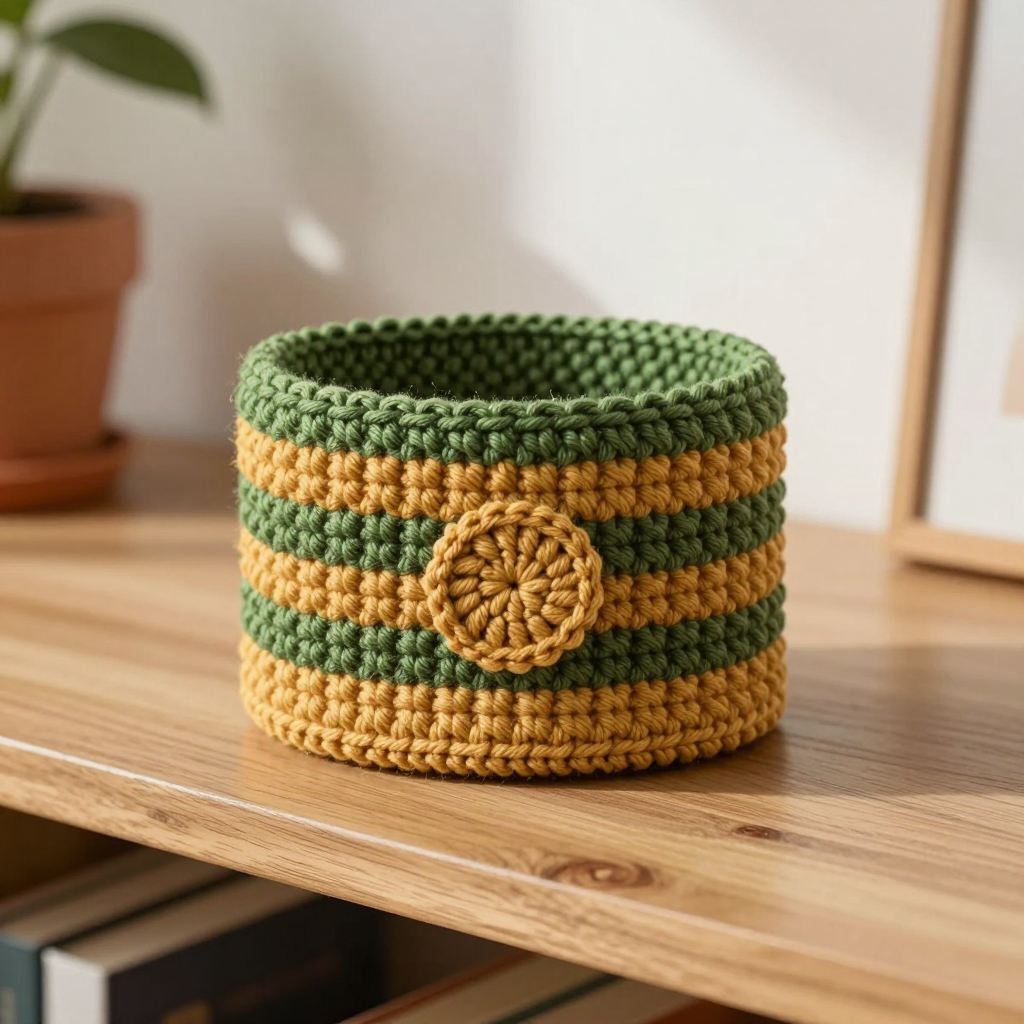
This kawaii tile ponytail cuff is the perfect quick win for anyone who wants a bold, textured hair accessory without a big time commitment. It is beginner-friendly: if you can chain, single crochet, and double crochet, you can make it. The chunky super bulky yarn works up fast into a thick, squishy tube that looks like a little band of Moroccan tile wrapped around your ponytail. Striped in olive and ochre with a raised alpine-stitch texture and a tiny circle appliqué at the front, it feels cozy, stretchy, and playful all at once.
Materials Needed
- Yarn: Super bulky (weight 6) acrylic. Color A (olive): approx. 20 yd. Color B (ochre): approx. 15 yd.
- Hook: 8 mm (US L-11).
- Notions: Tapestry needle, scissors, stitch marker (optional), measuring tape.
- Finished size: Approx. 3 inches wide x 2.5 inches tall when flat; the tube stretches to fit a ponytail.
Abbreviations
- ch – chain
- sl st – slip stitch
- sc – single crochet
- dc – double crochet
- st(s) – stitch(es)
- MR – magic ring
- A / B – Color A (olive) / Color B (ochre)
Gauge
6 stitches and 6 rows = 4 inches in alpine stitch. To check, crochet a small swatch in pattern, lay it flat without stretching, and measure the center 4 inches.
Tips Before You Start
- Keep your tension relaxed. The cuff must stretch over a ponytail, so a tight gauge will make it too snug.
- Count your 18 stitches at the end of every round; the crossed double crochet round is easy to miscount.
- Change colors on the final slip stitch of the previous round so the color join sits neatly at the back.
- Work the crossed double crochet loosely; the skipped stitch is picked up on the same round, so do not pull it tight.
Step-by-Step Instructions
Cuff (worked in joined rounds)
With A, ch 18, join with sl st to form a ring, being careful not to twist the chain.
R1: Ch 1, sc in each ch around, join with sl st to first sc (18 sts).
R2: Ch 2 (counts as first dc), dc in same st, [skip next st, dc in next st, dc in skipped st] repeat around, join with sl st to top of ch-2 (18 sts).
R3: Ch 1, sc in each st around, join with sl st to first sc (18 sts).
R4: Change to B, repeat R2 (18 sts).
R5: Repeat R3 (18 sts).
R6: Change to A, repeat R2 (18 sts).
R7: Repeat R3 (18 sts).
R8: Change to B, repeat R2 (18 sts).
R9: Repeat R3 (18 sts). Fasten off.
Appliqué (make 1 with B)
R1: MR, 6 sc, join with sl st to first sc (6 sts).
R2: Ch 1, 2 sc in each st around, join with sl st to first sc (12 sts). Fasten off, leaving a long tail.
Assembly and Finishing
Flatten the cuff so the two open ends of the tube line up and the stripes sit straight. Using the long tail and a tapestry needle, sew the appliqué to the front center of the cuff with small, even stitches, catching only the surface so the tube stays stretchy. Weave in all ends on the inside of the cuff. Lightly mist with water and press flat with your hands to block; do not over-stretch, or the cuff will lose its shape.
Pro Tips and Variations
- Swap the olive and ochre for any two colors you love, or use a single color for a minimalist look.
- Make the appliqué in a contrasting color, or add a second smaller circle for a layered tile motif.
- Work one extra sc round at the top and bottom edges for a slightly taller, more structured cuff.