Monochrome Stripe Cup Sleeve Free Crochet Pattern
Introduction
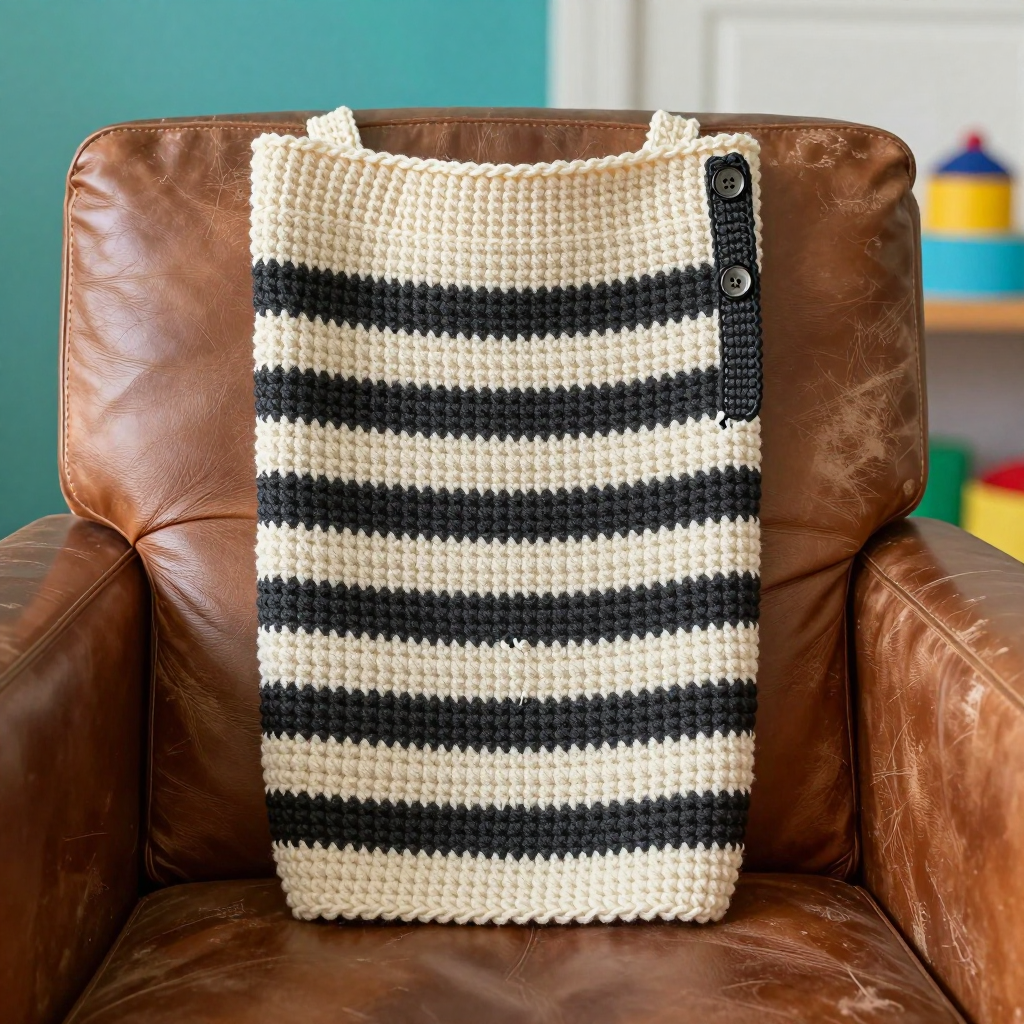
This Monochrome Stripe Cup Sleeve is a quick, beginner-friendly project for anyone who wants a polished, modern accessory for their morning coffee. Worked flat in simple single crochet and seamed into a straight tube, it uses just two colors — soft cream and deep charcoal — in wide, clean stripes. The snug cuff hugs standard 12–16 oz takeaway cups, and the two buttoned side tabs at the seam add a neat, tailored detail. The finished fabric is smooth and dense, keeping your hands comfortable while looking effortlessly minimal.
Materials Needed
- Yarn: (3) Light/DK weight, cotton or cotton-blend. Color A (cream): approx 45 yd. Color B (charcoal): approx 40 yd.
- Hook: 5 mm (H/8) crochet hook
- Notions: Tapestry needle, stitch markers, two 0.6 in (1.5 cm) buttons, scissors
- Finished size: Approx 3.25 in (8.3 cm) tall x 10.5 in (26.7 cm) circumference, flat before seaming; fits standard 12–16 oz cups (3.0–3.5 in diameter)
Abbreviations
- ch — chain: make a loop of yarn and pull it through the loop on your hook.
- sc — single crochet: insert hook, yarn over, pull up a loop, yarn over, pull through both loops.
- sc2tog — single crochet two together (a decrease): insert hook into the next stitch, pull up a loop, insert hook into the following stitch, pull up a loop, yarn over, pull through all three loops.
- sl st — slip stitch: insert hook, yarn over, pull through both the stitch and the loop on your hook.
- RS — right side: the outside face of the fabric.
- st(s) — stitch(es)
Gauge
16 sc x 18 rows = 4 in (10 cm) in single crochet. Work a small swatch in sc and measure a 4 in section; if you have more stitches than 16, go up a hook size, and if you have fewer, go down.
Tips Before You Start
- Change colors on the last yarn-over of the final stitch of a row so the new stripe starts cleanly at the edge.
- Keep your tension even and slightly firm — a dense fabric grips the cup better and hides the seam.
- Count your 42 stitches at the end of every row; the panel must stay straight for the tube to fit.
- Try the panel around your usual cup before seaming so you can adjust the width if needed.
Step-by-Step Instructions
Panel (worked flat, Color A)
Row 1: Ch 43, sc in 2nd ch from hook, sc across (42 sts).
Rows 2–5: Ch 1, turn, sc in each st across (42 sts).
Change to Color B.
Rows 6–9: Ch 1, turn, sc in each st across (42 sts).
Change to Color A.
Rows 10–13: Ch 1, turn, sc in each st across (42 sts).
Change to Color B.
Rows 14–17: Ch 1, turn, sc in each st across (42 sts).
Change to Color A.
Rows 18–21: Ch 1, turn, sc in each st across (42 sts).
Fasten off, leaving a 12 in tail.
Plain Tab (make 2, Color B)
Row 1: Ch 9, sc in 2nd ch from hook, sc across (8 sts).
Rows 2–3: Ch 1, turn, sc in each st across (8 sts).
Row 4: Ch 1, turn, sc2tog, sc 4, sc2tog (6 sts).
Row 5: Ch 1, turn, sc2tog, sc 2, sc2tog (4 sts).
Fasten off.
Buttonhole Tab (make 1, Color B)
Row 1: Ch 9, sc in 2nd ch from hook, sc across (8 sts).
Rows 2–3: Ch 1, turn, sc in each st across (8 sts).
Row 4: Ch 1, turn, sc 3, ch 2, skip 2, sc 3 (8 sts).
Row 5: Ch 1, turn, sc2tog, sc 4, sc2tog (6 sts).
Row 6: Ch 1, turn, sc2tog, sc 2, sc2tog (4 sts).
Fasten off.
Edging (Color A)
Top edge: With Color A, join at the seam, sc evenly around the top edge (approx 42 sc), sl st to first sc. Fasten off.
Bottom edge: Repeat the same round around the bottom edge (approx 42 sc), sl st to first sc. Fasten off.
Assembly and Finishing
Fold the panel in half with right sides together and whipstitch the short ends together to form a tube, then weave in the ends. Sew one plain tab to the right side at the seam, 1 in below the top edge. Sew the buttonhole tab to the right side at the seam, 1 in above the bottom edge, aligning its buttonhole with the plain tab. Sew a 0.6 in (1.5 cm) button to each plain tab through both layers. Weave in all remaining ends and block lightly to smooth the edges and even out the stripes.
Pro Tips and Variations
- Swap the two colors for a tonal look, or use a self-striping DK yarn for a no-color-change version.
- Add a third narrow stripe by working two extra rows in a contrasting shade between the wide bands.
- For a looser fit over larger cups, add 2–4 stitches to the starting chain and adjust the edging count to match.