Moss Stitch Seatbelt Comfort Strap Free Crochet Pattern
Introduction
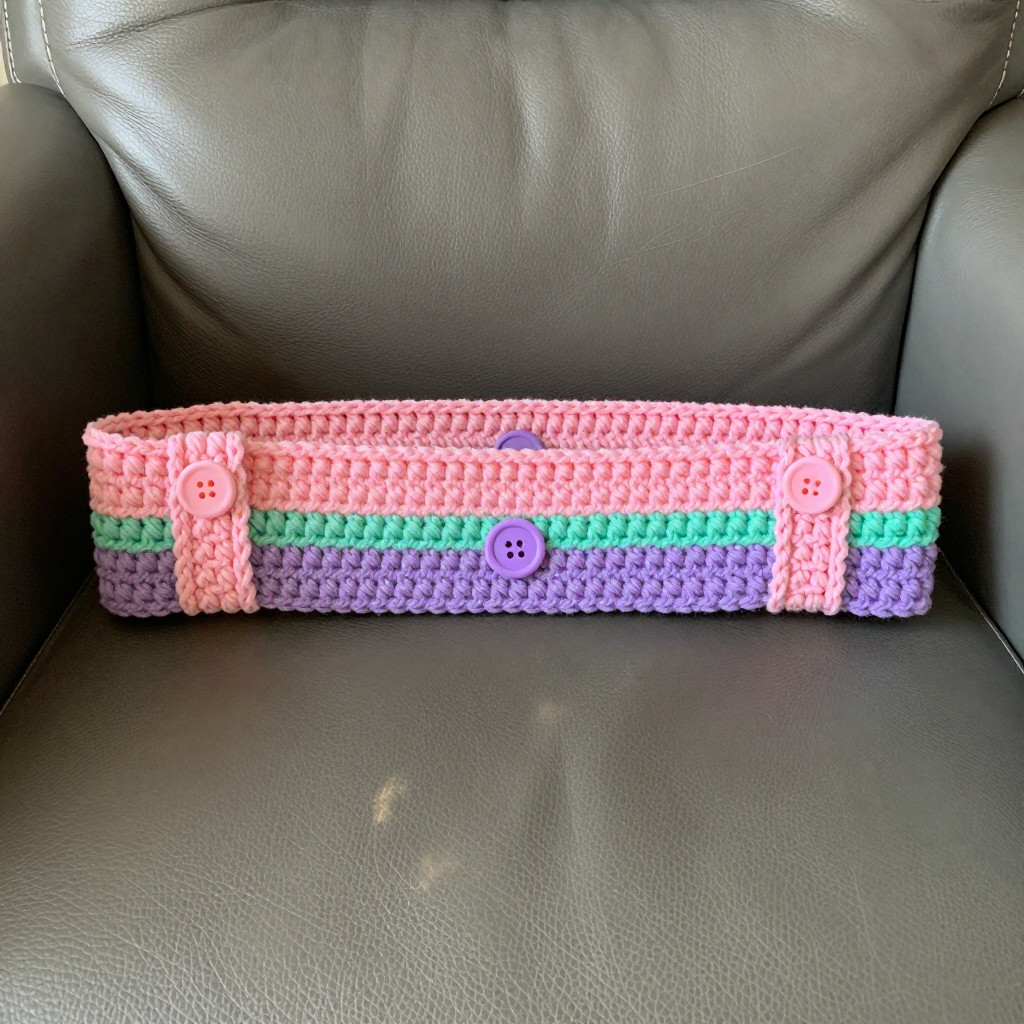
If your seatbelt digs into your shoulder or neck on every drive, this little strap is about to become your new favorite car accessory. Worked in soft, squishy chenille with the bumpy, woven look of moss stitch, it folds into a padded sleeve that buttons neatly around the seatbelt for instant comfort. Pastel color blocks in pale pink, mint, and lavender give it a chic, boutique feel that looks lovely against any car interior. It is a quick, beginner-friendly project you can finish in an evening with just a few yards of yarn.
Materials Needed
- Yarn: Chenille plush yarn, super bulky (weight category 6), 100% polyester, approximately 30 yards total: Color A (pale pink) 15 yards, Color B (mint) 10 yards, Color C (lavender) 5 yards
- Hook: 6.0 mm (US J-10)
- Notions: Tapestry needle, scissors, stitch marker (optional), one small button (the lavender crochet button is made in this pattern)
- Finished size: Approximately 3 inches (7.5 cm) wide by 10 inches (25 cm) long when folded
Abbreviations
- ch – chain
- sc – single crochet
- sl st – slip stitch
- sp / sps – space / spaces
- st / sts – stitch / stitches
- MR – magic ring (an adjustable loop)
- rep – repeat
Gauge
10 stitches and 10 rows = 4 inches (10 cm) in moss stitch. Work a small swatch in moss stitch and measure it; if you have more stitches than 10 in 4 inches, go up a hook size, and if you have fewer, go down a hook size.
Tips Before You Start
- Chenille yarn sheds and can be tricky to rip out, so count your stitches often and work with a light touch rather than pulling tight.
- Keep your chains loose and even; tight ch-1 spaces make the moss stitch pull in and the strap narrower than 3 inches.
- Change colors at the end of the last row of each color block by finishing the final sc with the new color, so the color change sits neatly at the edge.
- Because the strap folds in half, the wrong side of the fabric will be hidden inside the tube, so small color-change tails can simply be woven in on that side.
Step-by-Step Instructions
Strap (worked flat in moss stitch)
Row 1: With A, ch 16. Sc in 2nd ch from hook, [ch 1, skip 1 ch, sc in next ch] across, turn. (8 sc, 7 ch-1 sps)
Row 2: Ch 1, sc in first sc, [ch 1, skip ch-1 sp, sc in next sc] across, turn. (8 sc, 7 ch-1 sps)
Rows 3–12: Rep Row 2. (8 sc, 7 ch-1 sps) — approx 4.5 inches in A.
Rows 13–20: Change to B and rep Row 2. (8 sc, 7 ch-1 sps) — approx 3 inches in B.
Rows 21–24: Change to C and rep Row 2. (8 sc, 7 ch-1 sps) — approx 1.5 inches in C.
Fasten off.
Buttonhole Tab (make 2, one at each short end)
Row 1: With A, join yarn at one short end of strap. Ch 1, sc evenly across short end, turn. (8 sc)
Row 2: Ch 1, sc in each sc across, turn. (8 sc)
Row 3: Ch 1, sc in first 3 sc, ch 2, skip 2 sc, sc in last 3 sc, turn. (6 sc, 1 ch-2 sp)
Row 4: Ch 1, sc in each sc and 2 sc in ch-2 sp across, turn. (8 sc)
Fasten off. Rep Rows 1–4 for the other short end.
Button (make 1)
Rnd 1: With C, MR 6 sc. Join with sl st to first sc. (6 sc)
Fasten off, leaving a long tail.
Edging (optional)
Rnd 1: With right side facing, join A with sl st at one corner of the tube opening. Work 1 round of sc evenly around the opening, join with sl st to first sc. Fasten off.
Rep Rnd 1 for the other opening.
Assembly and Finishing
Fold the strap in half lengthwise with wrong sides together. Whipstitch or sl st the long edges together to form a tube, leaving the buttonhole tabs free at each end. Sew the button securely to the center of one buttonhole tab. Use the other buttonhole tab to button the strap closed around the seatbelt. Weave in all ends on the inside of the tube. Lightly steam or mist block the strap and let it dry flat, keeping the buttonhole tabs flat so they lie neatly.
Pro Tips and Variations
- Swap the pastel blocks for your car's interior colors, or make the whole strap in one color for a minimalist look.
- Add a second sc round to the edging for a slightly thicker, more cushioned opening.
- For a firmer buttonhole, work Row 3's ch-2 over a slightly larger hook, or add a tiny whipstitch around the opening to reinforce it.