Neon Dot Granny Stitch Bracelet Free Pattern
Introduction
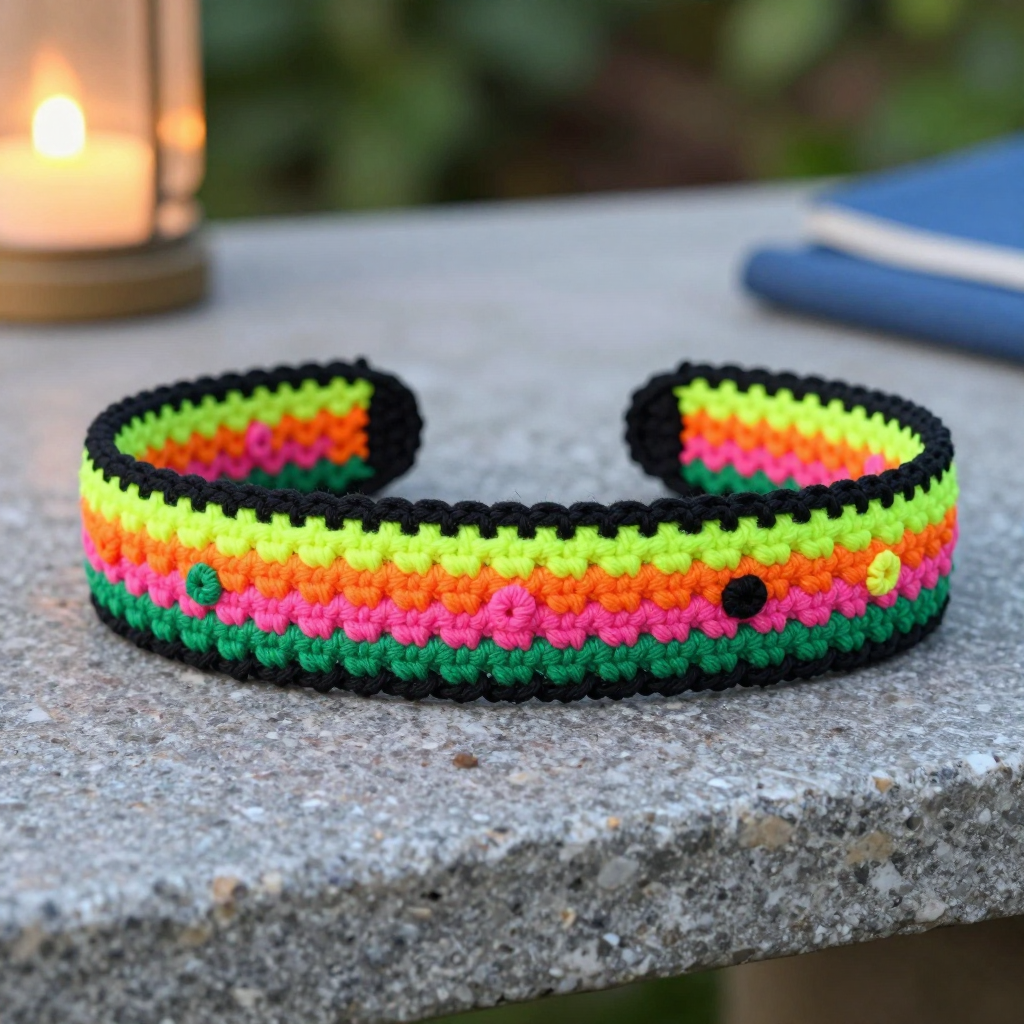
This Neon Dot Granny Stitch Bracelet is a cheerful little project for anyone who wants a quick, colorful win — it's perfect for beginners who have just learned double crochet, and for experienced makers who want a fast, satisfying gift. It's worked flat as a narrow granny-stitch band in bright neon stripes, then folded and seamed into a soft, flattened tube, with tiny contrast dots appliquéd on top like folk-art buttons. The finished bracelet is light and flexible, about an inch wide, and the snap closure makes it easy to put on and take off. Best of all, it uses only scraps of worsted cotton, so it's a wonderful stash-buster.
Materials Needed
- Yarn: Worsted weight (4) cotton yarn — 10 yds each of neon yellow (A), neon orange (B), neon pink (C), and neon green (D); 5 yds black (E) for the dots and edging.
- Hook: 3.5 mm (US E/4) crochet hook.
- Notions: Tapestry needle, sewing needle and matching thread, one sew-on snap (about 1/2 inch / 12 mm), scissors.
- Finished size: 7 inches (18 cm) long x 1 inch (2.5 cm) wide; fits a wrist of 6–7 inches (15–18 cm).
Abbreviations
- ch — chain: yarn over and pull through the loop on your hook.
- dc — double crochet: yarn over, insert hook, pull up a loop, yarn over and pull through 2 loops twice.
- sc — single crochet: insert hook, pull up a loop, yarn over and pull through both loops.
- sl st — slip stitch: insert hook, yarn over and pull through everything on the hook.
- sk — skip: leave the next stitch or chain unworked.
- sp — space: the gap between two clusters.
- rep — repeat.
- MR — magic ring: an adjustable loop you crochet into, then pull closed.
- st(s) — stitch(es).
Gauge
4 granny clusters = 2 inches (5 cm) in pattern. Work a small swatch of a few rows and measure across 4 clusters; if your clusters are larger, go down a hook size, and if smaller, go up one.
Tips Before You Start
- Keep your turning chains loose but consistent — a tight ch 3 makes the band edges pull in and the seam harder to sew.
- Count clusters at the end of every row: you should always have 7. It's the easiest way to catch a missed space early.
- Change colors on the last yarn-over of the final dc of the row so the new stripe starts cleanly.
- Cotton has little stretch, which is ideal here — the bracelet holds its shape and the snap stays aligned.
Step-by-Step Instructions
Bracelet Base (worked flat in rows)
With A, ch 21.
Row 1: 3 dc in 4th ch from hook (first cluster), *sk 2 ch, 3 dc in next ch; rep from * across, ending with 3 dc in last ch. Turn. (7 clusters)
Row 2: Ch 3, 3 dc in first sp between clusters, *3 dc in next sp; rep from * across, ending with 3 dc in last sp. Turn. (7 clusters)
Change to B.
Rows 3–4: Rep Row 2. (7 clusters per row)
Change to C.
Rows 5–6: Rep Row 2. (7 clusters per row)
Change to D.
Rows 7–8: Rep Row 2. (7 clusters per row)
Change to A.
Rows 9–10: Rep Row 2. (7 clusters per row)
Fasten off.
Dots (make 5 — one each in B, C, D, A, and E)
Rnd 1: MR, 6 sc into the ring. Join with sl st to first sc. (6 sts)
Fasten off, leaving a 6-inch tail for sewing.
Edging
With E, sc evenly around the entire outer edge of the bracelet, working 1 sc in each st and 1 sc in each row-end. Join with sl st to first sc. Fasten off.
Closure
Sew one half of the snap to one short end of the bracelet, centered. Sew the other half to the opposite short end, checking that the snap aligns when the bracelet is folded around your wrist.
Assembly and Finishing
Fold the bracelet in half lengthwise with right sides together. Whipstitch the seam along the long edges using matching yarn, then turn the tube right side out so the seam sits inside. Sew one dot centered on each color stripe — orange on B, pink on C, green on D, yellow on A — and one black dot centered on the first yellow stripe. Weave in all ends neatly on the inside. Lightly steam-block the bracelet flat, pressing gently with a damp cloth and warm iron (do not press hard on the dots), then let it dry fully before snapping it closed.
Pro Tips and Variations
- Swap the snap for a small button and a crochet chain loop at the opposite end for an adjustable fit.
- Use a self-striping cotton and skip the color changes for a quicker, equally colorful version.
- Make a matching set: work the same band in a single color and scatter multicolor dots for a subtle, modern look.