Sleepy Crescent Moon Wall Hanging Free Crochet Pattern
Sleepy Crescent Moon Wall Hanging Free Crochet Pattern
Introduction
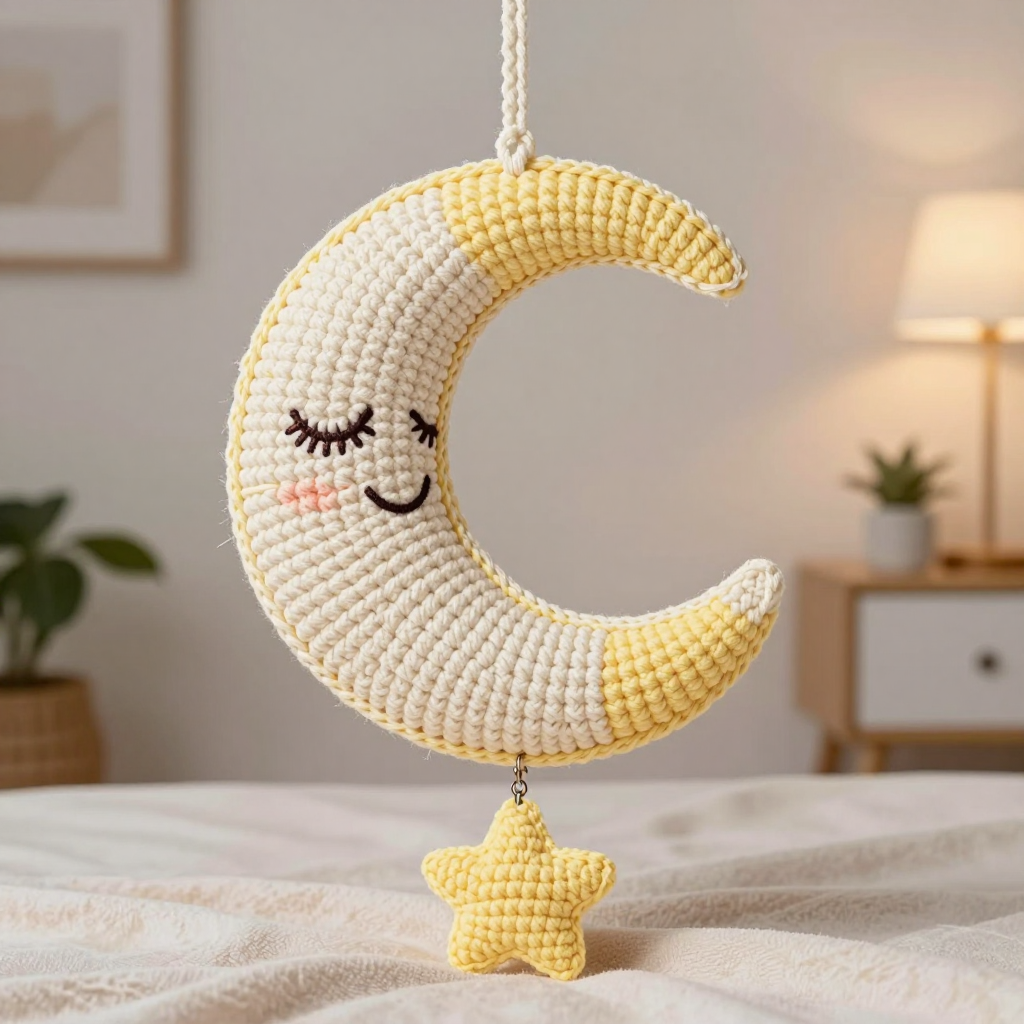
This sleepy crescent moon wall hanging is the sweetest little project for anyone who loves soft, whimsical nursery decor. It is made from two simple circles — a plump cream moon and a flat pale yellow overlay — joined along one edge so the exposed cream naturally forms a crescent. A tiny stuffed star dangles below on a short chain, and a few stitches of dark brown yarn give the moon its peaceful closed eyes and gentle smile. It works up quickly in worsted weight cotton, feels smooth and sturdy in the hand, and looks lovely hung above a crib, a reading nook, or a cozy doorway.
Materials Needed
- Yarn: Worsted weight (category 4) cotton yarn — 100 yds cream (Color A), 50 yds pale yellow (Color B), and a small amount of dark brown (Color C) for embroidery.
- Hook: 4.0 mm (US G-6).
- Notions: Polyester fiberfill (small amount for the star), tapestry needle, stitch marker, scissors, rust-proof pins for assembly.
- Finished size: Moon 8 inches (20 cm) tall x 6 inches (15 cm) wide; star 2 inches (5 cm) across.
Abbreviations
- ch — chain: yarn over and pull through the loop on your hook.
- sc — single crochet: insert hook, yarn over, pull up a loop, yarn over, pull through both loops.
- inc — increase: work 2 single crochet into the same stitch.
- dec — decrease: work 2 single crochet together into one stitch.
- MR — magic ring: an adjustable loop you crochet into to start a closed circle.
- sl st — slip stitch: insert hook, yarn over, pull through everything on the hook.
- sts — stitches.
Gauge
16 sc x 18 rows = 4 inches (10 cm) in single crochet. Work a small swatch and measure it; if your stitches are larger than this, go down a hook size so the moon keeps its intended 8 x 6 inch shape.
Tips Before You Start
- Work the moon (A) and overlay circle (B) at the same gauge so the two pieces line up neatly along the inner curve.
- Use a stitch marker in the first stitch of each round — both circles are worked in continuous spirals, so the marker keeps your counts honest.
- Stuff the moon only lightly, if at all. A firm ball will not sit flat against the wall, and the overlay needs a soft surface to pin onto.
- Leave a generous tail on the overlay circle; you will use it for the whipstitch seam, so there is no need to join a new strand.
Step-by-Step Instructions
Moon (Color A)
Rnd 1: MR, 6 sc (6 sts).
Rnd 2: inc x6 (12 sts).
Rnd 3: [sc, inc] x6 (18 sts).
Rnd 4: [2 sc, inc] x6 (24 sts).
Rnd 5: [3 sc, inc] x6 (30 sts).
Rnd 6: [4 sc, inc] x6 (36 sts).
Rnd 7: [5 sc, inc] x6 (42 sts).
Rnd 8: [6 sc, inc] x6 (48 sts).
Rnd 9: [7 sc, inc] x6 (54 sts).
Rnd 10: [8 sc, inc] x6 (60 sts).
Rnds 11-20: sc in each st around (60 sts).
Rnd 21: [8 sc, dec] x6 (54 sts).
Rnd 22: [7 sc, dec] x6 (48 sts).
Rnd 23: [6 sc, dec] x6 (42 sts).
Rnd 24: [5 sc, dec] x6 (36 sts).
Rnd 25: [4 sc, dec] x6 (30 sts).
Rnd 26: [3 sc, dec] x6 (24 sts).
Rnd 27: [2 sc, dec] x6 (18 sts).
Rnd 28: [sc, dec] x6 (12 sts).
Rnd 29: dec x6 (6 sts). Fasten off and weave the opening closed.
Overlay Circle (Color B)
Rnd 1: MR, 6 sc (6 sts).
Rnd 2: inc x6 (12 sts).
Rnd 3: [sc, inc] x6 (18 sts).
Rnd 4: [2 sc, inc] x6 (24 sts).
Rnd 5: [3 sc, inc] x6 (30 sts).
Rnd 6: [4 sc, inc] x6 (36 sts).
Rnd 7: [5 sc, inc] x6 (42 sts).
Rnd 8: [6 sc, inc] x6 (48 sts).
Rnd 9: [7 sc, inc] x6 (54 sts).
Rnd 10: [8 sc, inc] x6 (60 sts). Fasten off, leaving a long tail for sewing.
Star (Color B)
Rnd 1: MR, 5 sc (5 sts).
Rnd 2: inc x5 (10 sts).
Rnd 3: [sc, inc] x5 (15 sts).
Rnd 4: sc in each st around (15 sts).
Rnd 5: [sc, dec] x5 (10 sts). Stuff firmly with fiberfill.
Rnd 6: dec x5 (5 sts). Fasten off and weave the opening closed.
Face Embroidery (Color C)
Using dark brown yarn and a tapestry needle, embroider two closed eyes and a small smile with satin stitch on the cream moon, positioning them on the exposed crescent area so they are not covered by the overlay. Work the eyes as two short horizontal stitches and the smile as a shallow curved stitch beneath them.
Hanging Chain and Loop
Star chain: ch 10, then sl st to join the chain to the bottom point of the moon and to the top of the star, forming a 3-inch hanging chain.
Hanging loop: ch 15, sl st to form a loop, and attach securely to the top of the moon.
Assembly and Finishing
Pin the overlay circle (B) onto the moon (A) so the top edge of B aligns with the inner curve of A, letting the exposed cream form a crescent shape. Using the long tail and a tapestry needle, whipstitch B to A along the overlapping edge only, leaving the outer curve of B free. Stuff lightly behind the overlay if desired, then finish the seam. Attach the star chain and hanging loop as described above. Weave in all ends securely, then block the moon lightly by misting it and pinning it flat to dry so the crescent holds its shape.
Pro Tips and Variations
- Swap the pale yellow overlay for soft gray or dusty blue for a different nursery palette.
- Add a second tiny star on a shorter chain for a little constellation effect.
- Use a 3.5 mm hook and finer yarn for a smaller, daintier version that fits a shelf display.