River Stone Oval Hot Pad Free Crochet Pattern
Introduction
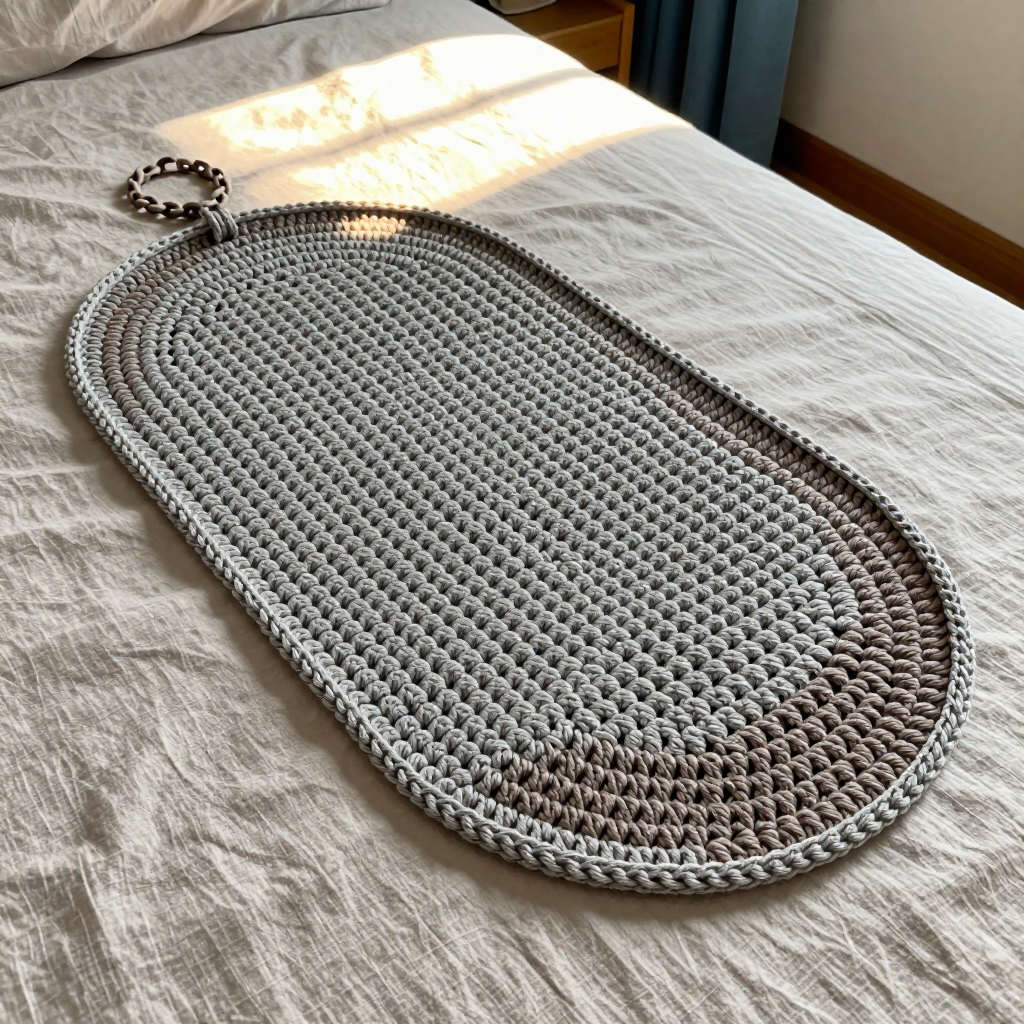
The River Stone Oval Hot Pad is a beginner-friendly crochet project that works up quickly in worsted weight cotton. It is perfect for anyone who has just learned single crochet and wants a practical, finished-looking project to be proud of. The flat oval shape is built from a short starting chain with gentle increases at both ends, so it lies perfectly flat on your counter. Worked in a soft stone gray with a taupe color-block band, it has a calm, earthy look and a dense, sturdy feel that protects your table and your hands.
Materials Needed
- Yarn: Worsted weight (4) cotton yarn, approximately 80 yards total — 50 yards stone gray (A), 30 yards taupe (B). Cotton is recommended because it handles heat well.
- Hook: 5.5 mm (I-9) crochet hook
- Notions: Tapestry needle for weaving in ends, scissors, stitch marker (optional)
- Finished size: Approximately 9 inches long by 6 inches wide
Abbreviations
- ch — chain: yarn over and pull through the loop on your hook.
- sc — single crochet: insert hook in stitch, yarn over, pull up a loop, yarn over, pull through both loops.
- sl st — slip stitch: insert hook in stitch, yarn over, pull through both the stitch and the loop on your hook.
- st / sts — stitch / stitches
- R — row (or round)
Gauge
14 stitches and 16 rows = 4 inches in single crochet. To check, crochet a small swatch in single crochet and measure a 4-inch section; if you have more stitches than 14, go up a hook size, and if you have fewer, go down a hook size.
Tips Before You Start
- Keep your tension even and slightly firm — a dense fabric is what makes a hot pad safe to use.
- Count your stitches at the end of every increase row; the totals in this pattern are your best guide.
- The first stitch of each round is easy to miss after the joining slip stitch — mark it with a stitch marker if you tend to lose it.
- Work the starting chain loosely so the first row is easy to crochet into.
Step-by-Step Instructions
Oval Body (Color A, then Color B)
Setup: With A, ch 16.
R1: sc in 2nd ch from hook, sc in each ch across, 3 sc in last ch, turn to work along opposite side of ch, sc in each ch across, 2 sc in last ch, join with sl st to first sc (32 sc).
R2: ch 1, 2 sc in first st, sc in each st across to last 3 sts, 2 sc in next st, sc in next st, 2 sc in next st, sc in last st, join (36 sc).
R3: ch 1, sc in each st around, join (36 sc).
R4: ch 1, 2 sc in first st, sc in each st across to last 3 sts, 2 sc in next st, sc in next st, 2 sc in next st, sc in last st, join (40 sc).
R5: ch 1, sc in each st around, join (40 sc).
R6: ch 1, 2 sc in first st, sc in each st across to last 3 sts, 2 sc in next st, sc in next st, 2 sc in next st, sc in last st, join (44 sc).
R7: ch 1, sc in each st around, join (44 sc).
Change to B.
R8–13: ch 1, sc in each st around, join (44 sc).
Fasten off.
Hanging Loop
Loop: With B, join yarn at one end of the oval, ch 10, sl st in same st, fasten off.
Assembly and Finishing
There is no seaming to do — the hot pad is worked in one piece. Weave in all ends on the wrong side with your tapestry needle, working each tail through several stitches so it stays secure. Block lightly by misting with water and patting flat into an even oval shape; let it dry completely before use. Trim any remaining yarn tails.
Pro Tips and Variations
- Make a matching set by swapping the color block — try a cream body with a rust band, or keep both colors in the same family for a subtle look.
- Add a second layer: crochet two ovals and join them with a round of single crochet for extra heat protection.
- For a thicker hanging loop, work the chain with two strands of B held together, or make the loop longer if you plan to hang it on a hook.