Apricot Net Overshirt and Cami: Free Crochet Pattern
Introduction
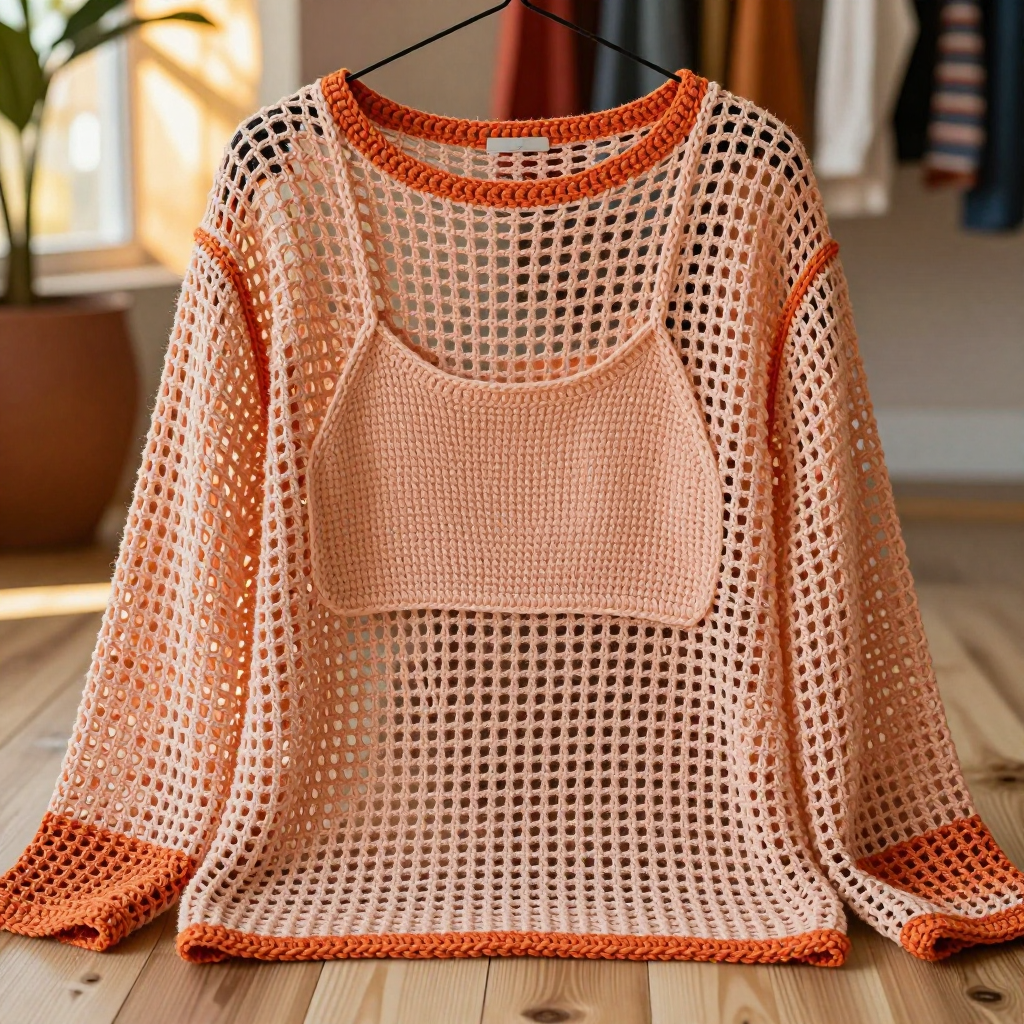
This Y2K-inspired lounge set is made for anyone who wants a soft, breezy layer with a little retro attitude. The overshirt is built from simple rectangles of open net stitch, so it looks airy and see-through while still being easy to crochet. The color-blocked peach back and apricot fronts and sleeves give it that two-tone, early-2000s feel. Underneath, a plain peach cami in single crochet keeps things comfortable and wearable. Together they feel light, drapey, and perfect for layering over a tee or wearing on its own.
Materials Needed
- Yarn: Fingering weight wool (approximately 400 yards per 100 g). You will need about 300 yards peach and 200 yards apricot.
- Hook: 3.5 mm (US E-4).
- Notions: Tapestry needle, stitch markers, measuring tape, scissors.
- Finished size: Overshirt — 20 inches (51 cm) across the back, 18 inches (46 cm) long. Cami — to fit bust 30–32 inches (76–81 cm), 12 inches (30 cm) long.
Abbreviations
- ch — chain
- dc — double crochet
- sc — single crochet
- sp — space
- sl st — slip stitch
- st(s) — stitch(es)
- rep — repeat
- rnd — round
Gauge
Mesh pattern: 6 mesh squares and 8 rows = 4 inches (10 cm). Cami: 20 sc and 24 rows = 4 inches (10 cm). Work a small swatch in each and measure it flat before beginning.
Tips Before You Start
- Keep your mesh chains loose and even — tight ch-1 spaces make the net stiff and change the finished width.
- Count your mesh squares at the end of every few rows; the open pattern makes it easy to lose one at the edges.
- Try the cami on as you go, since it is a straight tube with no shaping.
- Place stitch markers at the shoulder and armhole points before seaming so the openings stay symmetrical.
Step-by-Step Instructions
Overshirt Back (Peach)
Row 1: Ch 61. Dc in 6th ch from hook, *ch 1, skip 1 ch, dc in next ch; rep from * to end, turn (29 mesh squares).
Rows 2–36: Ch 4 (counts as dc, ch 1), skip first ch-1 sp, *dc in next dc, ch 1, skip next ch-1 sp; rep from * across, ending with dc in last dc, turn (29 mesh squares).
Fasten off.
Overshirt Front (Make 2, Apricot)
Row 1: Ch 31. Dc in 6th ch from hook, *ch 1, skip 1 ch, dc in next ch; rep from * to end, turn (14 mesh squares).
Rows 2–36: Ch 4 (counts as dc, ch 1), skip first ch-1 sp, *dc in next dc, ch 1, skip next ch-1 sp; rep from * across, ending with dc in last dc, turn (14 mesh squares).
Fasten off. Make a second panel the same way.
Sleeves (Apricot, Make 2)
Row 1: Ch 41. Dc in 6th ch from hook, *ch 1, skip 1 ch, dc in next ch; rep from * to end, turn (19 mesh squares).
Rows 2–24: Ch 4 (counts as dc, ch 1), skip first ch-1 sp, *dc in next dc, ch 1, skip next ch-1 sp; rep from * across, ending with dc in last dc, turn (19 mesh squares).
Fasten off. Make a second sleeve the same way.
Cami (Peach)
Rnd 1: Ch 120, join with sl st to form ring. Ch 1, sc in each ch around, join with sl st (120 sc).
Rnds 2–30: Ch 1, sc in each st around, join with sl st (120 sc).
Fasten off.
Straps (Make 2)
Rows 1–20: Join yarn to front top edge at desired position. Ch 1, sc in next 10 sts. Work 20 rows in sc (10 sts).
Fasten off. Attach strap to back top edge. Make the second strap the same way.
Edging
Rnd 1: Join apricot to neckline. Sc evenly around neckline. Fasten off.
Assembly and Finishing
Sew the front panels to the back at the shoulders, leaving the center 6 inches open for the neck. Sew the sleeves into the armholes, then close the side seams and sleeve seams. Weave in all ends. Block lightly: mist the pieces, shape them flat to the finished measurements, and let them dry completely before wearing.
Pro Tips and Variations
- Swap the colors — make the back apricot and the fronts and sleeves peach for a reversed look.
- Work the cami a few rounds longer for a tunic-length layer.
- Use a cotton-blend fingering yarn for a cooler, more summery version of the set.