Gold Chevron Brim Beanie: Free Crochet Pattern
Gold Chevron Brim Beanie: Free Crochet Pattern
Introduction
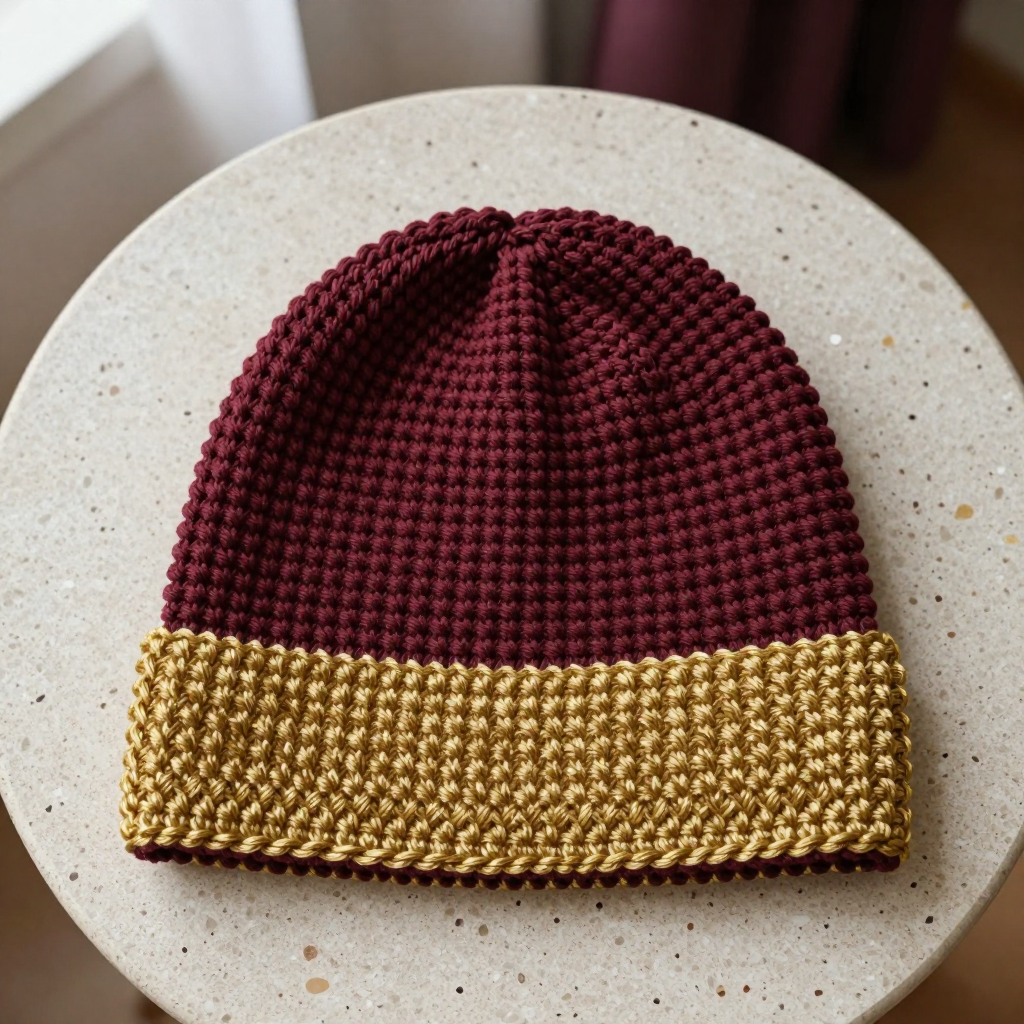
This beanie is for anyone who wants a modern, graphic hat without complicated colorwork or charts. A wide gold band, worked flat in rows and seamed into a ring, shows off a simple chevron zigzag made from single and double crochet, while the solid burgundy body keeps the rest of the hat easy and relaxing. The result is a clean two-tone beanie that looks polished but is friendly to advanced beginners. It feels soft and stretchy on the head, with a firm, structured brim that holds its shape.
Materials Needed
- Yarn: DK weight (3), acrylic or wool blend. Burgundy: approx. 150 (170, 190) yds. Gold: approx. 50 (60, 70) yds.
- Hooks: 5.0 mm (H-8) for the band and body; 4.0 mm (G-6) for the edging.
- Notions: Tapestry needle, stitch marker, measuring tape, scissors.
- Finished size: Child: 18" circumference, 7.5" height; Teen/Small Adult: 20" circumference, 8" height; Large Adult: 22" circumference, 8.5" height.
Abbreviations
- ch — chain
- sc — single crochet
- dc — double crochet
- sl st — slip stitch
- sc2tog — single crochet two stitches together (a decrease)
- st(s) — stitch(es)
- RS — right side (the outside of the hat)
Gauge
16 sts and 16 rows = 4 inches in single crochet with the 5.0 mm hook. Work a small swatch in sc, measure a 4-inch section, and adjust your hook size if your stitch count is off.
Tips Before You Start
- Counts are given for Child with Teen/Small Adult and Large Adult in parentheses — always work the number that matches your size.
- The gold band is worked flat and seamed, so keep your row tension even; uneven rows will make the zigzag look wobbly.
- When you join burgundy to the band, work one sc into each row-end stitch so the stitch count matches the band length exactly.
- Try the hat on before the final decrease rounds; the body should reach just past the top of the ears.
Step-by-Step Instructions
Brim Band (Gold, 5.0 mm hook)
Row 1: Ch 11, sc in 2nd ch from hook and each ch across (10 sc).
Row 2: Ch 1, turn, sc in first 4 sts, dc in next 2 sts, sc in last 4 sts (10 sts).
Row 3: Ch 1, turn, sc in first 3 sts, dc in next 4 sts, sc in last 3 sts (10 sts).
Row 4: Ch 1, turn, sc in first 2 sts, dc in next 6 sts, sc in last 2 sts (10 sts).
Row 5: Ch 1, turn, sc in first st, dc in next 8 sts, sc in last st (10 sts).
Row 6: Ch 1, turn, sc in first 2 sts, dc in next 6 sts, sc in last 2 sts (10 sts).
Row 7: Ch 1, turn, sc in first 3 sts, dc in next 4 sts, sc in last 3 sts (10 sts).
Row 8: Ch 1, turn, sc in first 4 sts, dc in next 2 sts, sc in last 4 sts (10 sts).
Rows 9–72 (80, 88): Repeat Rows 2–8, then Row 2 once more (10 sts each row). Do not fasten off. Band measures approx. 18 (20, 22)" long.
Join Band: Bring short ends together, working through both thicknesses, sl st across to seam. Fasten off.
Body (Burgundy, 5.0 mm hook)
Round 1: With RS facing, join burgundy with sl st to any st along top edge of band, ch 1, sc evenly around top edge, working 1 sc in each row-end st (72 (80, 88) sc). Join with sl st to first sc.
Rounds 2–24 (26, 28): Ch 1, sc in each st around. Join with sl st to first sc (72 (80, 88) sc).
Shape Crown
Round 25: Ch 1, [sc in next 7 sts, sc2tog] around. Join (64 (72, 80) sc).
Round 26: Ch 1, [sc in next 6 sts, sc2tog] around. Join (56 (64, 72) sc).
Round 27: Ch 1, [sc in next 5 sts, sc2tog] around. Join (48 (56, 64) sc).
Round 28: Ch 1, [sc in next 4 sts, sc2tog] around. Join (40 (48, 56) sc).
Round 29: Ch 1, [sc in next 3 sts, sc2tog] around. Join (32 (40, 48) sc).
Round 30: Ch 1, [sc in next 2 sts, sc2tog] around. Join (24 (32, 40) sc).
Round 31: Ch 1, [sc in next st, sc2tog] around. Join (16 (24, 32) sc).
Round 32: Ch 1, [sc2tog] around. Join (8 (12, 16) sc).
Fasten off, leaving a long tail. Thread the tail through the remaining sts and pull tight to close.
Edging (Gold, 4.0 mm hook)
Round 1: With RS facing, join gold with sl st to bottom edge of band, ch 1, sc evenly around bottom edge, working 1 sc in each row-end st. Join with sl st to first sc. Fasten off.
Assembly and Finishing
The band seam is already joined; make sure it sits flat and is hidden at the back of the hat. Weave in all ends on the wrong side, taking care not to pull the fabric tight. Block lightly to the finished measurements: mist the hat, shape it over a bowl or hat form, and let it dry completely. This opens up the chevron texture and smooths the crown.
Pro Tips and Variations
- Swap the gold for cream or charcoal for a more subtle chevron band.
- Add a second band repeat in a contrasting color for a wider, bolder brim.
- Work the body in half double crochet for a faster, slightly warmer hat — adjust your round count to keep the height the same.