Mountain Trail Crossbody Free Crochet Pattern

Introduction
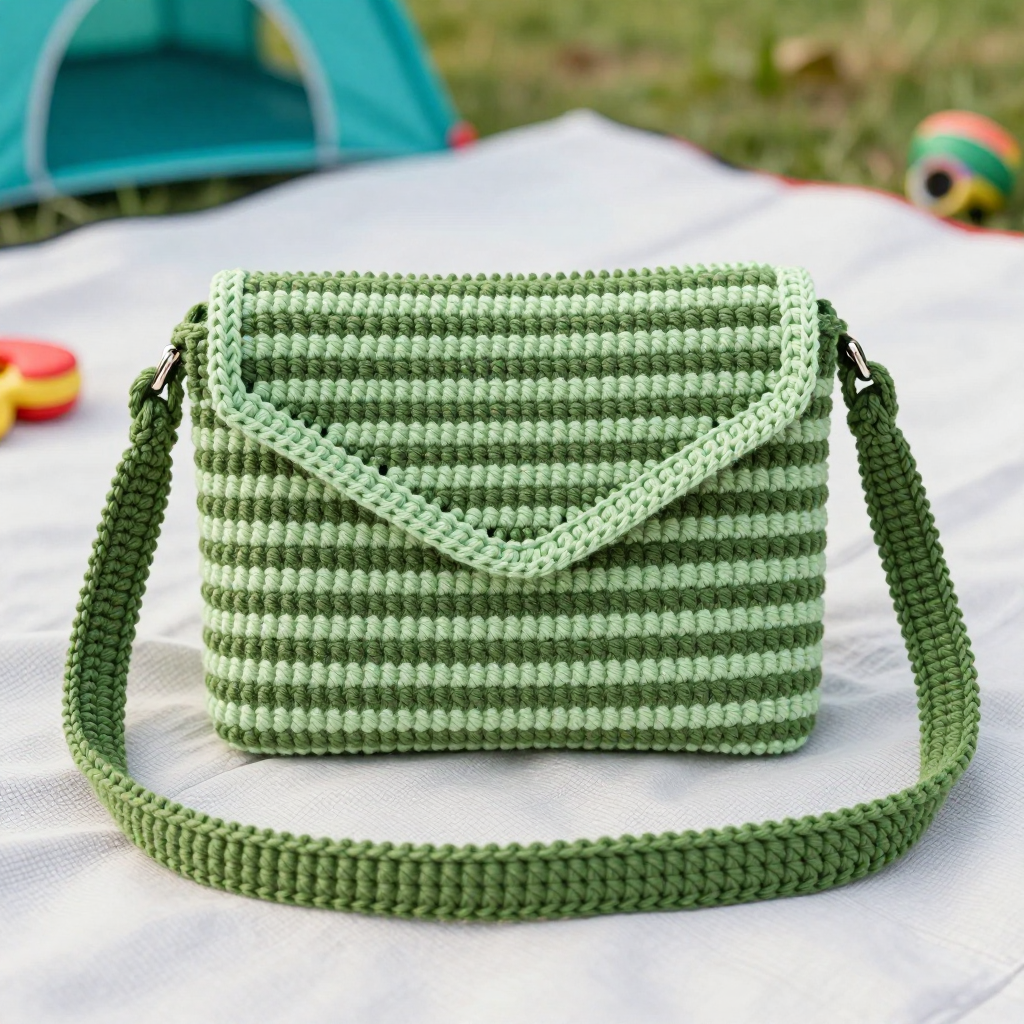
The Mountain Trail Crossbody is a compact, rectangular bag that's perfect for carrying just the essentials on your next outdoor adventure. It's made from two identical flat panels, so you only need to master one simple stitch pattern before you seam everything together. The emerald green body with two narrow blush stripes gives it a crisp, trail-ready look, while the dense single and double crochet texture makes the fabric sturdy enough to hold its shape. Whether you're a brand-new crocheter or a seasoned maker looking for a quick weekend project, this bag is a joy to stitch and a pleasure to wear across your body.
Materials Needed
- Yarn: Worsted weight (4) acrylic or cotton blend — emerald: 150 yds; blush: 100 yds
- Hook: 4 mm (G/6)
- Notions: Tapestry needle, scissors, stitch markers (optional), measuring tape
- Finished size: Bag body 8" wide x 10" tall; strap 44" long x 1" wide
Abbreviations
- ch — chain: make a loop of yarn and pull it through the loop on your hook.
- sc — single crochet: insert hook, yarn over, pull up a loop, yarn over, pull through both loops.
- dc — double crochet: yarn over, insert hook, pull up a loop, yarn over and pull through two loops, yarn over and pull through remaining two loops.
- st(s) — stitch(es)
- rep — repeat
- sl st — slip stitch: insert hook, yarn over, pull through both the stitch and the loop on your hook.
- RS — right side (the outside face of the fabric)
Gauge
18 sts and 18 rows = 4 inches in the sc, dc pattern. To check, crochet a small swatch in pattern and measure a 4-inch section — if you have more stitches than 18, go up a hook size; if fewer, go down.
Tips Before You Start
- Make both panels before seaming so you can match the stripe placement exactly.
- Keep your turning chains loose so the side edges stay straight and easy to seam.
- Count your stitches at the end of each row — the sc, dc pattern should always total 36 sts.
- Work the strap in one long sitting if you can; 198 rows goes faster with a podcast or show on.
Step-by-Step Instructions
Bag Body (make 2 panels)
With emerald, ch 37.
Row 1: sc in 2nd ch from hook, dc in next ch, *sc in next ch, dc in next ch; rep from * across, turn (36 sts).
Row 2: ch 1, sc in first st, dc in next st, *sc in next st, dc in next st; rep from * across, turn (36 sts).
Rows 3-8: rep Row 2 (36 sts).
Change to blush.
Rows 9-10: rep Row 2 (36 sts).
Change to emerald.
Rows 11-26: rep Row 2 (36 sts).
Change to blush.
Rows 27-28: rep Row 2 (36 sts).
Change to emerald.
Rows 29-36: rep Row 2 (36 sts). Fasten off.
Strap
With blush, ch 5.
Row 1: sc in 2nd ch from hook and in each ch across, turn (4 sts).
Rows 2-198: ch 1, sc in each st across, turn (4 sts). Fasten off.
Assembly
Place panels with RS together. Join emerald with sc through both layers along the sides and bottom, working 1 sc in each st and 1 sc in each row-end. Fasten off. Turn RS out.
Edging
Join blush at top edge.
R 1: sc evenly around top opening, join with sl st to first sc. Fasten off.
Attach Strap
Sew ends of strap to top corners of bag on the inside, 1" from side edges, using emerald yarn.
Assembly and Finishing
After seaming the sides and bottom and turning the bag right side out, weave in all ends securely on the inside. Block lightly by misting with water and shaping the bag flat; let it dry completely before attaching the strap. Sew the strap ends firmly with emerald yarn, going back and forth a few times for strength, then weave in those ends.
Pro Tips and Variations
- Swap the blush stripes for a contrasting color like mustard or cream for a different look.
- Add a simple button and loop closure at the top opening for extra security.
- Line the bag with a cotton fabric for a sturdier, more polished finish.